Illustrator is a great tool for making vector-based illustrations. Typography, logos, etc are the preferred subjects of Adobe Illustrator. So we decided to make a halftone Illustrator tutorial with which you can create halftone patterns within 5 minutes. There are two methods to create these patterns and each of them gives slightly different results, but the same great halftone.
This article will help you make halftone patterns of different shapes and colors. I will also include a trick to add the halftone to text to create halftone typography. What this article does not have is applying halftone to illustrations to get the “comic book” effect. That needs another article which we’ll make in the future.
The tools you’ll need (and be familiar with) to learn this tutorial are rectangle tool, blend, expand, image tracing, clipping mask, and transform tool. Don’t worry if you are not familiar with any of these tools, there is nothing complex to use in them for this tut.
Halftone using effects in Illustrator
This is probably the easiest and quickest way of getting a halftone pattern. The tradeoff here is that you have very little control over how the halftone looks. Here’s how you can create it;
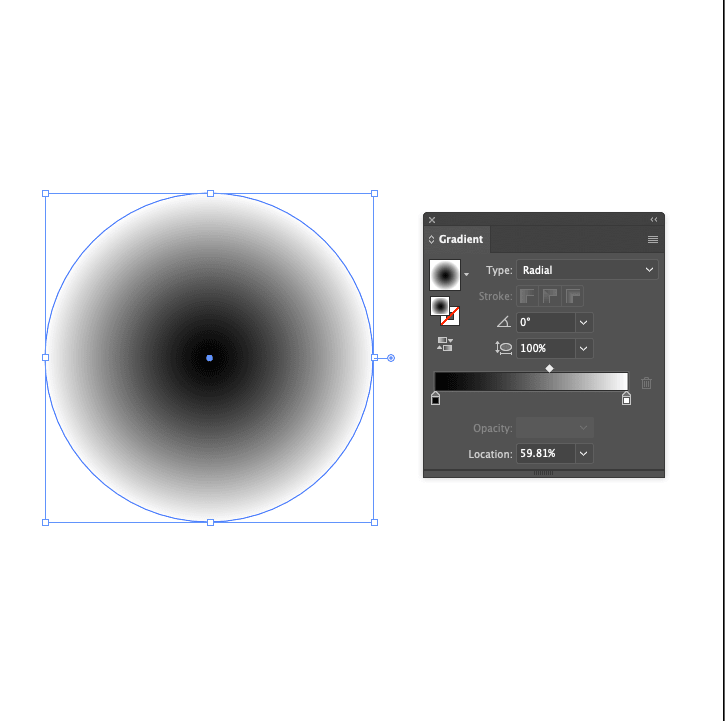
Step 1– Create a circle or a rectangle. A circle will give a circular halftone pattern while the rectangle will give a linear pattern. Let’s begin with the rectangle to understand the basics of it.
Step 2– Create a black and white gradient for the rectangle, keeping the diffusion type to linear. This gradient refers to the circles (or dots) in the halftone pattern. The black part will have the largest dots while white will have the smallest. The size decreases across the gradient.
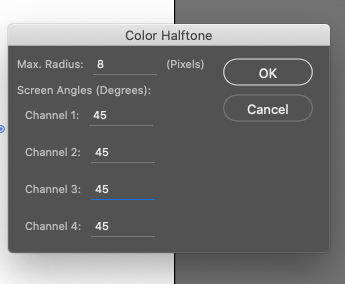
Step 3– After the gradient has been created, it is time to create the halftone. Select the gradient and go to Effects>Pixelate>Color halftone. This will summon a dialogue box for the halftone settings. Here’s what you should do.
The first option asks for the maximum radius of the dot. This specifies the size of the largest dot where the halftone starts. Adjust it to a number that looks good. You can put a value and then undo it if it doesn’t look, thereby making adjustments.
Apart from that, there are four other options termed Channels 1-4. These channels represent the colors (CMYK – Cyan, magenta, Yellow, and Key). When all these colors are aligned, you get the black color. The channel value is the angle of deviation. Make it 45 and that particular dot will move 45 degrees.
Here, we need all the channels to have the same values. 90 degrees will make a straight line while 45 degrees will create a slanted line. Anything in between will give the expected result. Keep in mind to set all channels’ value to the same value. We’ll go with 45º.
Step 4– If you zoom in the halftone pattern, you’ll notice that the edges are blurry. This is because it is not a vector object. The halftone feature has been taken from Illustrator’s older brother, Photoshop. This is why it is pixel-based. To fix that, go to Effects>Document Raster Effects Setting. This brings a dialogue box.
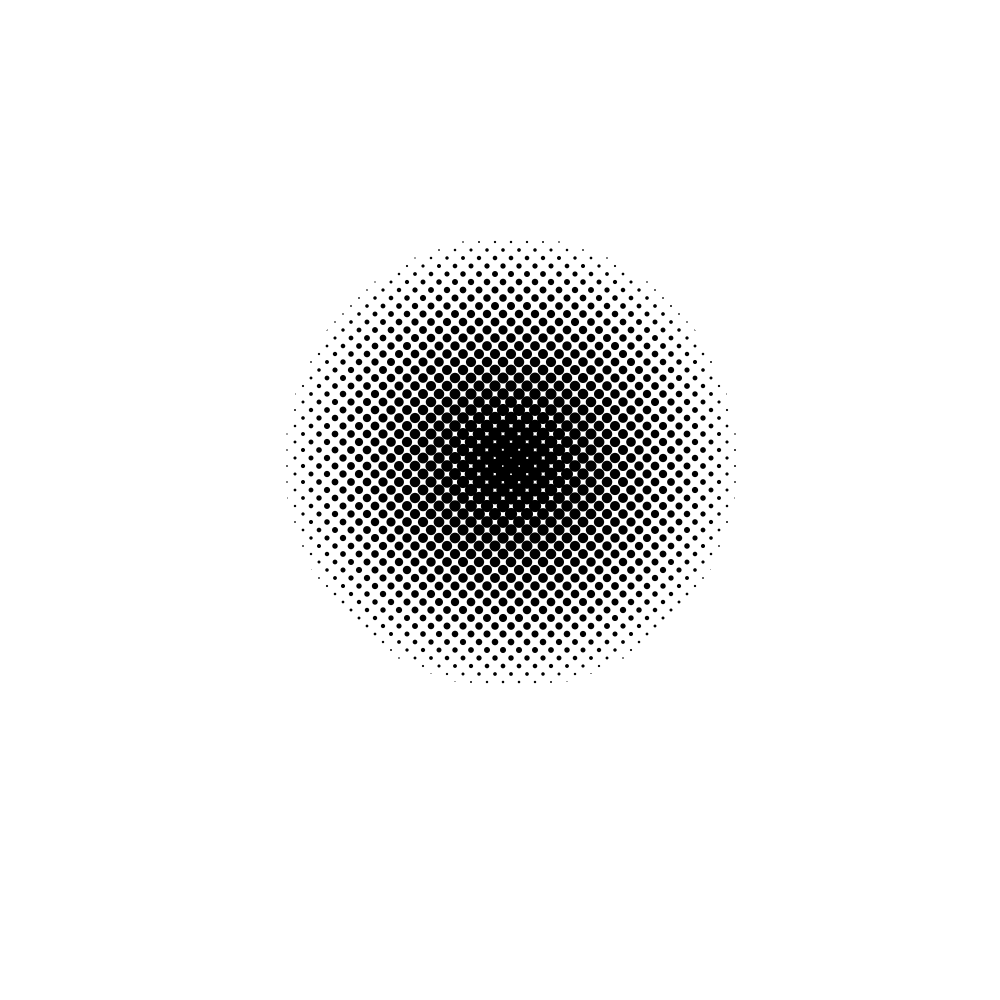
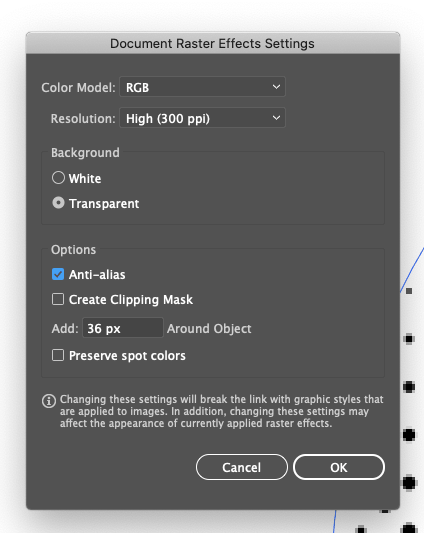
Select the resolution to high (300ppi), the background to transparent, and check the anti-aliasing box. Anti-aliasing smoothens the jagged edges of the halftone dots. This step makes the halftone pattern crisp and sharp. But the job is not complete.
Step 5– With the halftone selected, go to Object>Expand Appearance. This turns the halftone into an image.
Step 6– With the crisp image ready, all we need to do is trace it. Go to Window>Image trace and a dialogue box appears. This is where you adjust the settings. First, enable preview. Second, select the “ignore white” option. Make sure that the mode is black and white.
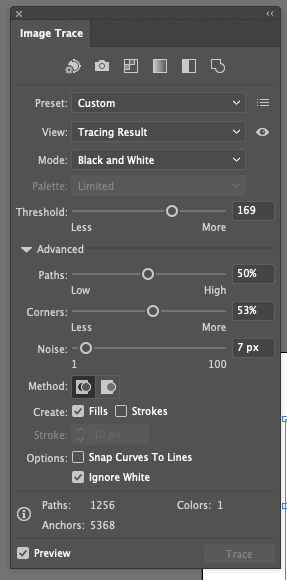
For the sliders, keep the threshold level to just a little over the middle, around 150. You can see the effect it has on the pattern and you can adjust it accordingly. Deselect “snap curves to lines” and noise to zero. All the other sliders can be kept at around 50%. Finally, when you are done, go to Object>Image trace>Expand.
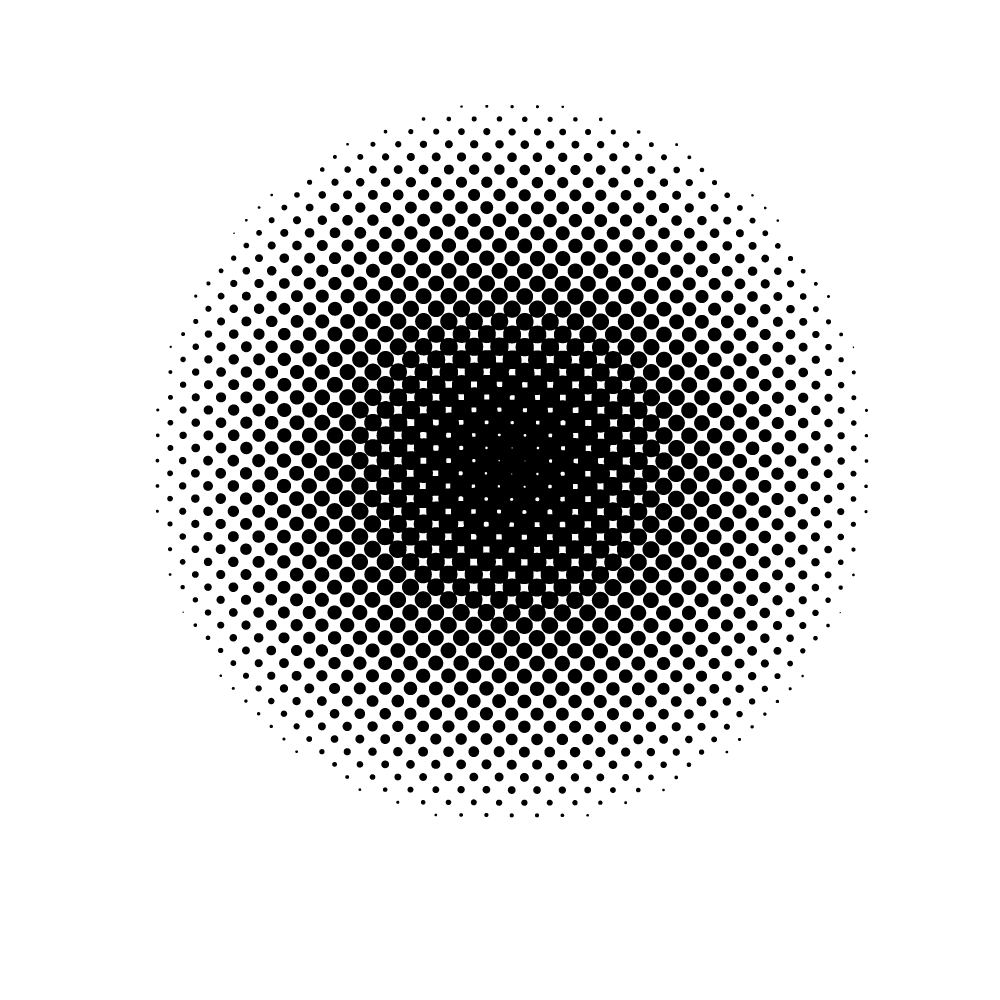
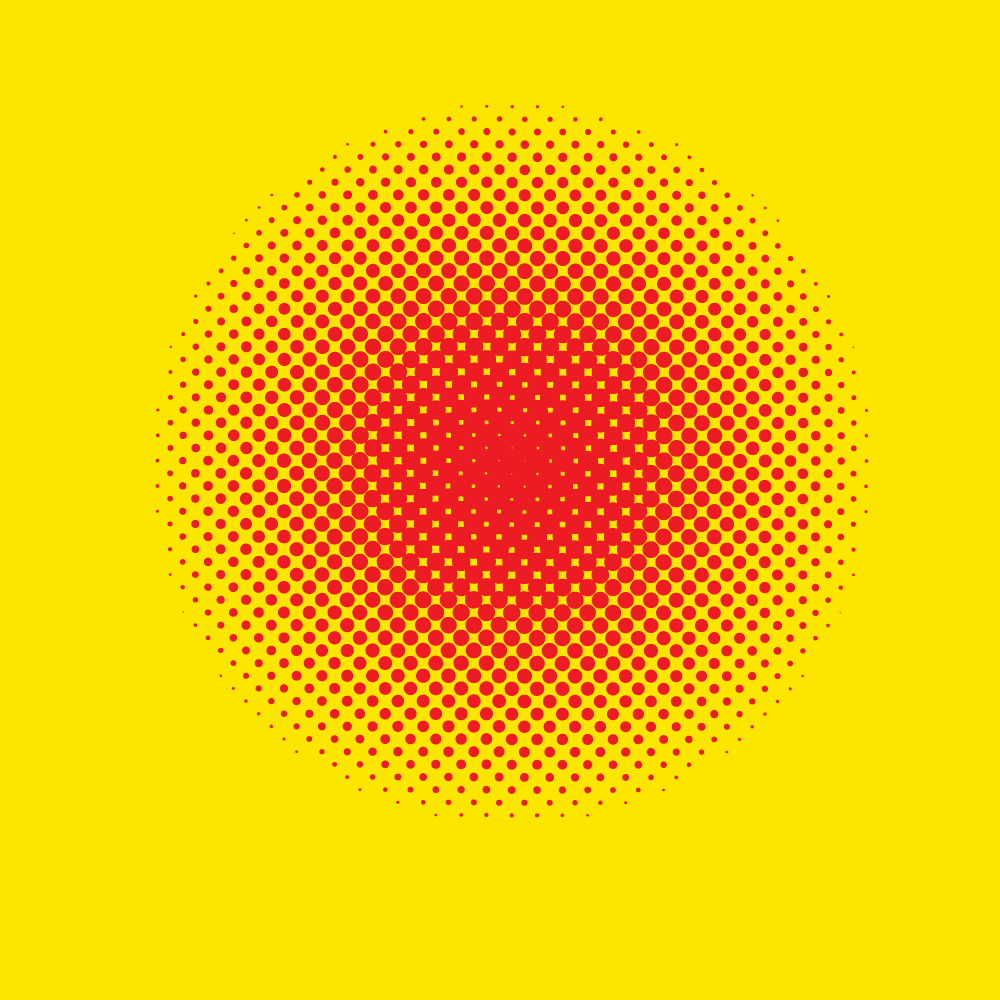
You have the gradient. You can resize it however you like and since it is in vector form, there will be no distortion or jagged lines. The same can be done with a circle shape and you’ll get similar results. You can change the color of the halftone dots by simply selecting it and using the color picker. Here’s a nifty typography trick using the halftone we created.
Now I know that this method looks like a headache with so many steps involved. So why did I call this the quicker and easier method? That’s because once you are used to the commands and steps, it is just a bunch of clicking.
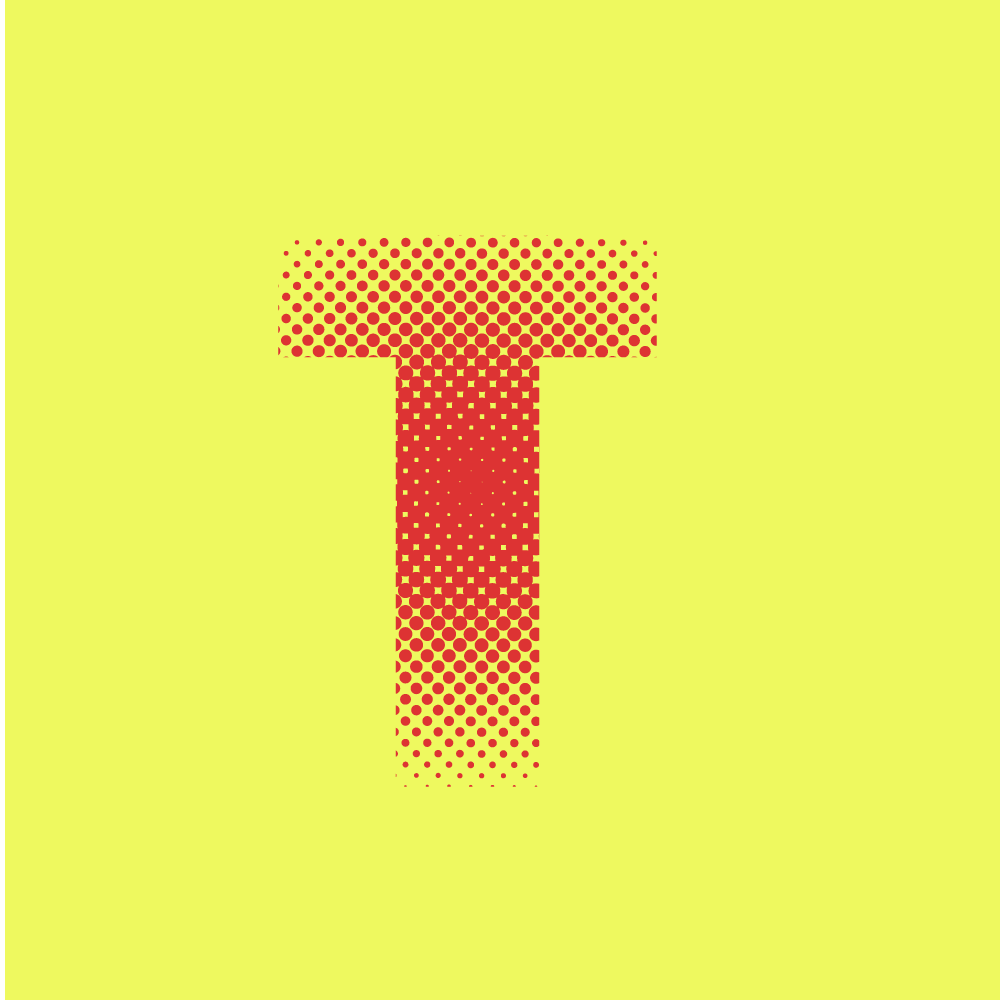
Applying halftone to text
Keep the halftone that we created before. Or you can create a new one. You can apply this halftone pattern to any text you want very easily. Here’s how to do it.
Step 1– Since we already created the halftone pattern, we don’t need to repeat the process. Use the text tool and write something on which you want to apply the pattern.
Step 2– Convert the text file into a vector object by creating outlines. Select the text and right click>Create outlines. The text is now a vector object.

Step 3– Select the halftone that we previously created. We need to turn it into a compound path. Select the halftone, go to Object>Compound path>Make. You won’t notice any difference or you may see that the halftone has turned transparent. That’s normal.
Step 4– Keep the halftone pattern over the text. Adjust the size of the pattern or the text to your liking. Make sure that the halftone pattern is above the text. Right click> Make clipping mask. The text now has the halftone pattern over it.
Step 5– You can change the color of the text using the direct selection tool. Press “A” on your keyboard to toggle to direct selection tool. Select the black text and then change the color to whatever you want. Or you can change the color before making the clipping mask. You are done. You have the pattern on the text.

Using the transform tool to create a halftone pattern
The transform tool is a very useful tool often ignored. You can create different types of halftone patterns with not just simple dots, but with any shape you want. Here’s how you do it;
Step 1– Select a shape that will act as the dot for your halftone pattern. I’ll choose the hexagon because it looks very clean. Right-click on the rectangle tool from the toolbar and select the polygon tool. Create a six-sided shape (hexagon) of 20-pixel size.
Create another hexagon but the size of this one will be 5-pixel. Make sure that the smart guides are turned on. To turn on, go to View>Smart guides. This will help us align the two shapes in one line.
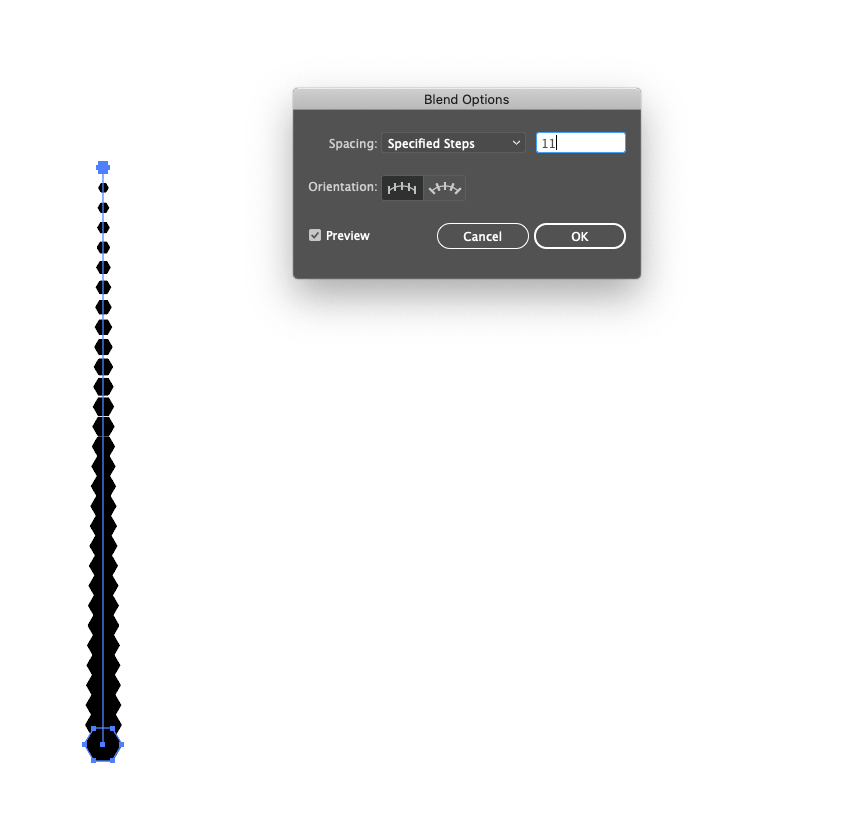
Step 2– Place the smaller hexagon above the larger one as shown in the picture. Now we blend the two. Select both the shapes, go to Object>Blend>Make. From the blend dialogue box, keep the specified steps to 11 steps.
Step 3– Select the object that we just created and copy it horizontally. Press Command+D or Control+D to repeat the process automatically. Now we have something that resembles a halftone pattern but not quite.
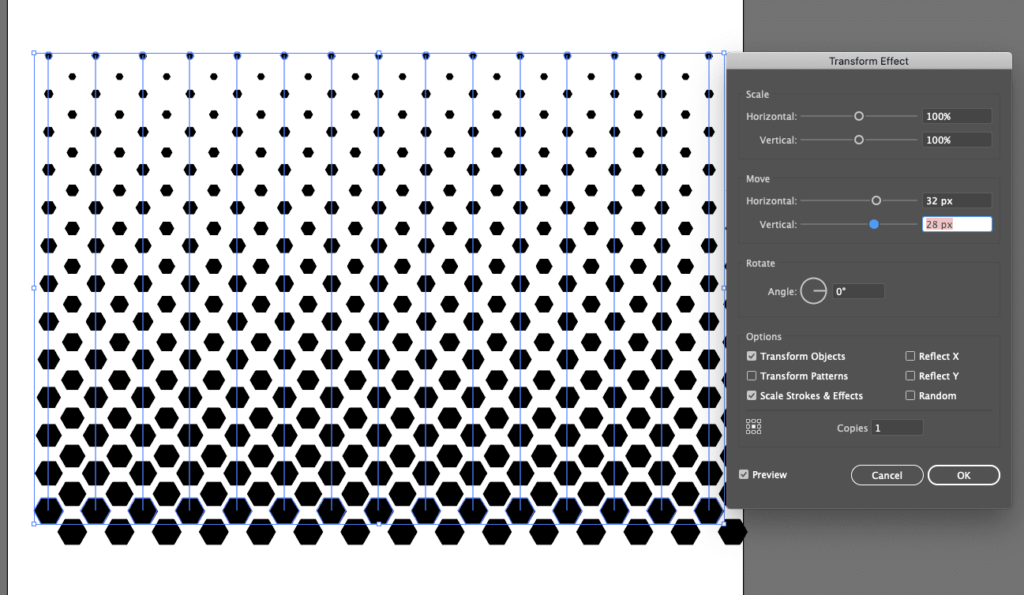
Step 4– Select the pattern we just created, the entire pattern. Go to Effects>Distort and Transform>Transform. A dialogue box appears. This is where the magic occurs.
Step 5– Make sure you select the preview box. Make the number of copies to 1 and then start increasing the horizontal value slowly. For me, 32 pixels were great. Don’t worry if there is overlapping. Make the vertical value to 28 pixels. If the size of the shapes is different, you can adjust it until you feel like it. We are almost done.
Step 6– After you are done with creating the halftone pattern, all you have to do is create a rectangle or a circle if you like. This will encompass the pattern inside, giving it a clean, contained look.
Make a circle or rectangle. We’ll make a rectangle. Place it over the pattern. Anything inside the rectangle or circle will be visible. Place the shape above the pattern. Right-click>Make Clipping Mask.
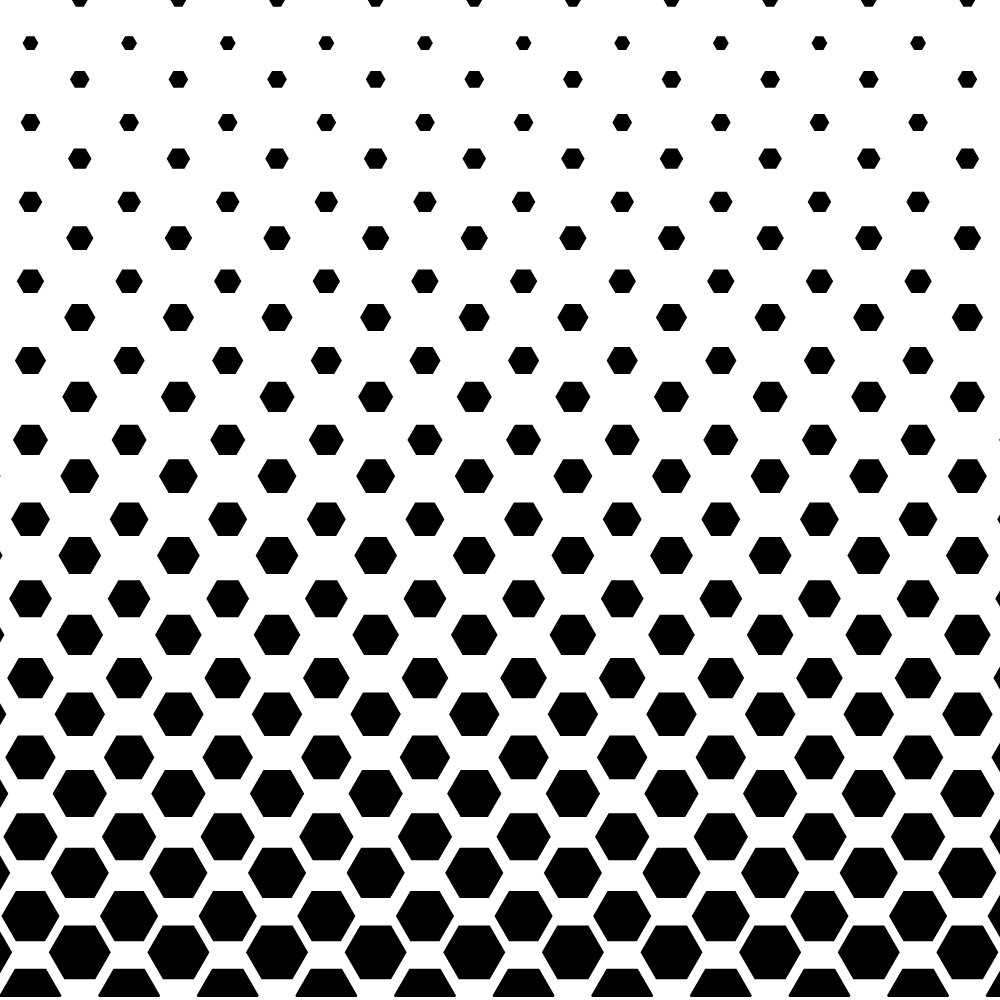
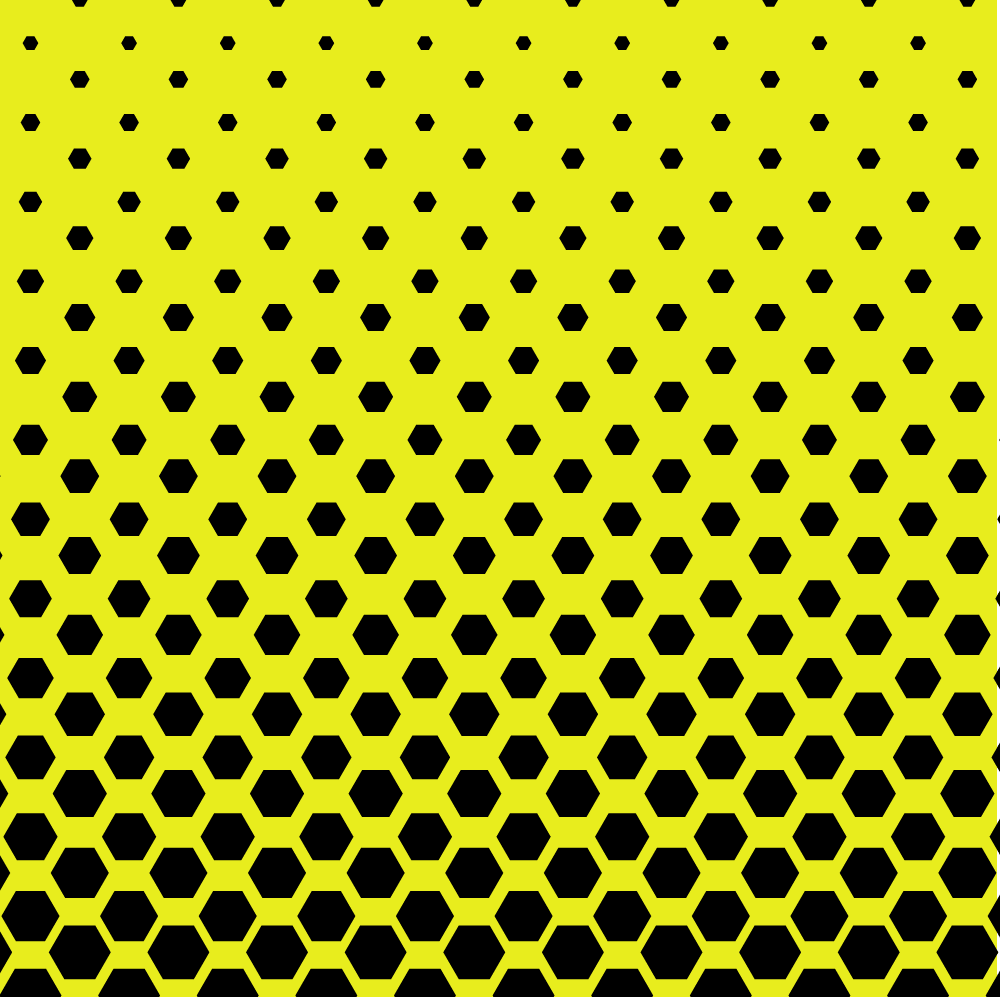
There you go, you have the halftone pattern inside the shape. Congrats, you’ve learned how to make halftone patterns. Now go ahead and create different halftone patterns with different shapes because there is nothing more helpful than practicing and getting better at it.
Read more Illustrator tutorials
- How to use the scissor and knife tool in Adobe Illustrator
- How to get rid of the background of any picture in Illustrator
- Here’s an easy tutorial to make PewDiePie-like trippy pattern
- How to add noise using the texture tool in Adobe Illustrator
You can choose various colors with Colorhunt. Colorhunt is not a sponsor or paying us in any way. I just like their collection and find it easy to choose the hex color. Really helps with the workflow. So try it and keep practicing, the more you practice, the better you get at it. See you later, crocodile. I messed it up, didn’t I?