
Wondering how to crop an image in Adobe Illustrator? Don’t break a sweat because this article will solve your problem. Not only you’ll learn how to crop an image instantly, but I’ll teach you a small nifty trick that will enable you to crop an image in whatever shape you want. Yes, you heard it right, in any shape. So be it perfect circle, square, star-shaped, or any shape made by you! Ready to learn and bring the graphic designer in you? We will begin shortly. Before, these are the tutorial for how to crop in illustrator and will work for Illustrator 2020, 2019, and even 2017. I’ll be using Illustrator for MacOs but these tutorials are valid for Microsoft Windows too. So if you asked “why can’t I crop in Illustrator,” today you learn how you can. Enough talk, let’s get into the tutorial.
How to crop in Illustrator.
First, when you open Illustrator, you have the white space that is the defined area where you work. To crop an image (JPEG, PNG, etc), here’s what you do.
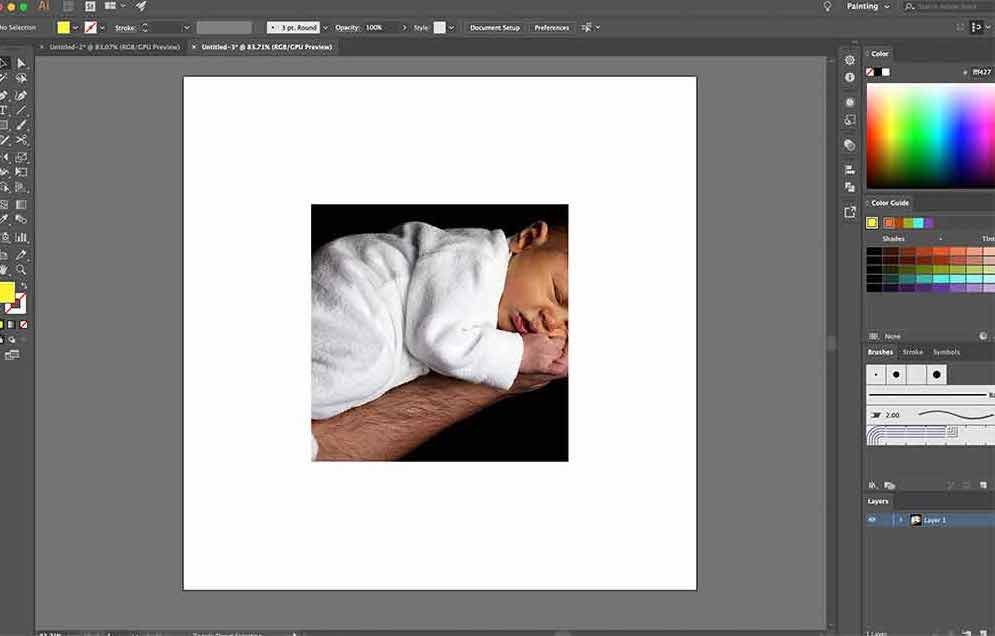
Step 1 : Bring the image into the artboard or the white space. Once place in the artboard, click on the image once to highlight it. Refer to pictures for better understanding.

As you can see in the image, I have choses the image of this beautif.
Step 2 : With the image selected (with the blue highlights), you’ll see on the top bar of Illustrator, an option which asks to crop the image. Click on it. This is the faster method and usually comes on all the versions of Illustrator after CS5.

ALSO
Alternative : On the top status bar of your desktop or Mac, with Illustrator selected, click on Object > Crop Image. This will lead to the same results.

Step 3: Once in the Crop option, you can either crop the image freely using the cursor and adjusting the window of cropping, or you can enter the value in the “height” and “width” section of the Crop toolbar. This can be helpful if you want to crop the image in a particular dimension. For example, I want the final image to have a dimension of 200 px by 200 px (a perfect square). So I put the value and boom, the crop window takes the desired dimension.
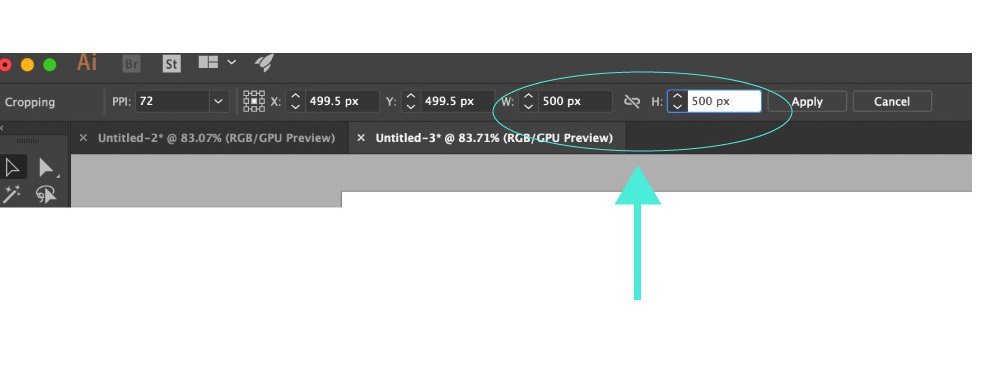
Step 4 : Press the apply button and your image will be cropped. Easy peasy.
Tips : To keep the proportion of the crop window same, hold shift while adjusting the size of the crop window. This will give you a cropped version of the image which is in same proportion as the original image. Look at the image provided and you’ll get a better idea.
How to Crop in Illustrator in any shape.
The general cropping method will allow you to crop only in one particle shape. You can either reduce the height or the width of the image. This restricts us from cropping an image into desired proportions or shapes. So how to crop in illustrator in any shape you want? We will be using another feature of an illustrator to crop the very same image. This feature is called “Clipping mask,” and it is a great tool to create unique images. Here is how to crop the image in any shape.
Step 1 – Select the image you want to crop and put the image in the artboard. Now you don’t need to select the image right away.
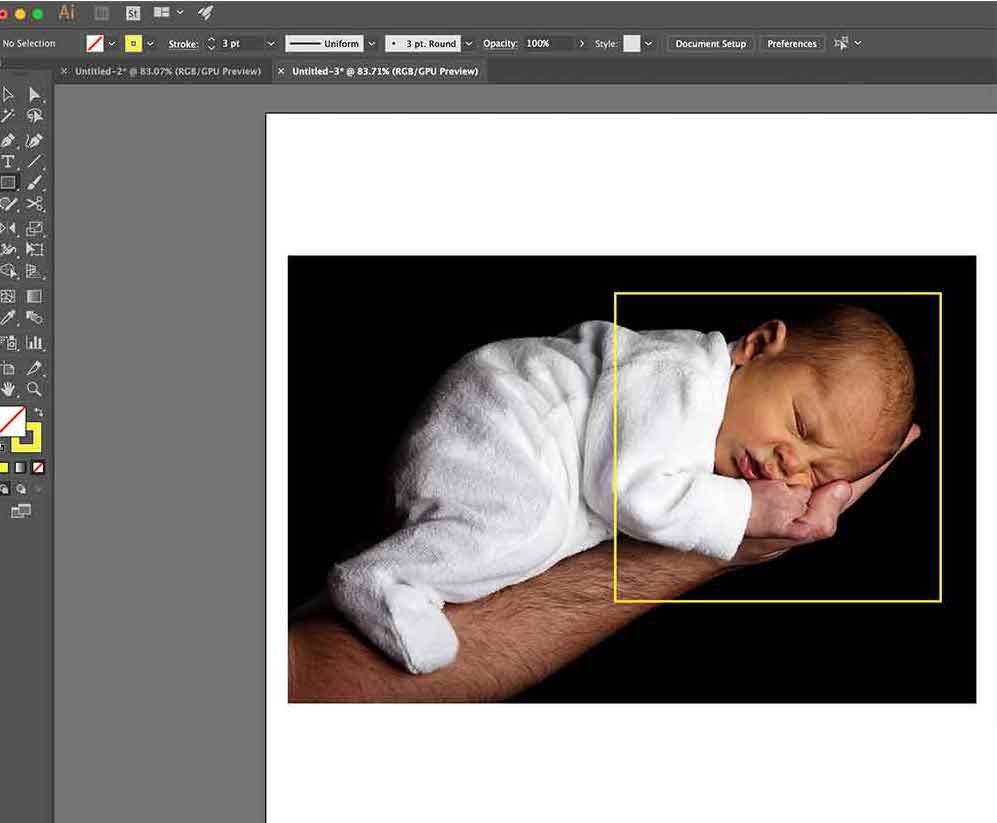
Step 2 – Make the shape that you want the image to be cropped in. If you want your image to be cropped in the shape of a square or a circle, then create that shape. I’ll tell you how.
Step 3 – Creating the shape. If you want a square, press M. If you want a circle, press L in Illustrator. Or if you want any other shape, you can right-click on the rectangle tool and choose from the different shapes (as shown in the image).
Step 4 – To make the shape, just click once on the artboard, and make the shape. You can make a perfect square and perfect circles by holding shift while creating the shapes.
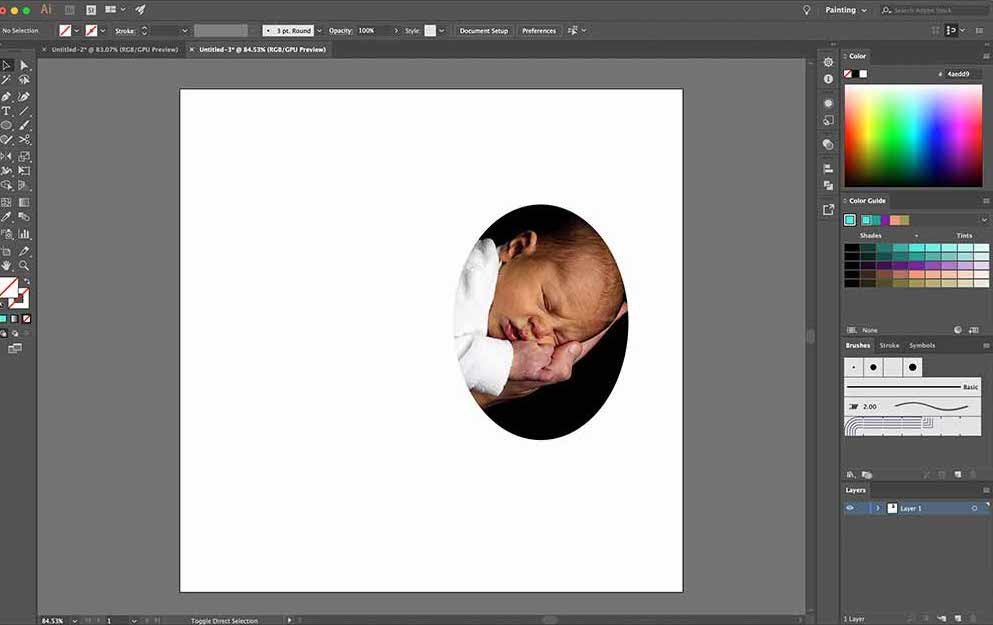
Step 5 – After you are satisfied with the shape, place the shape on the image you want to crop. Remember to keep the fill at none (shown in the image). Note – Everything visible inside the shape will remain. Parts of the image outside the shape will be cropped.

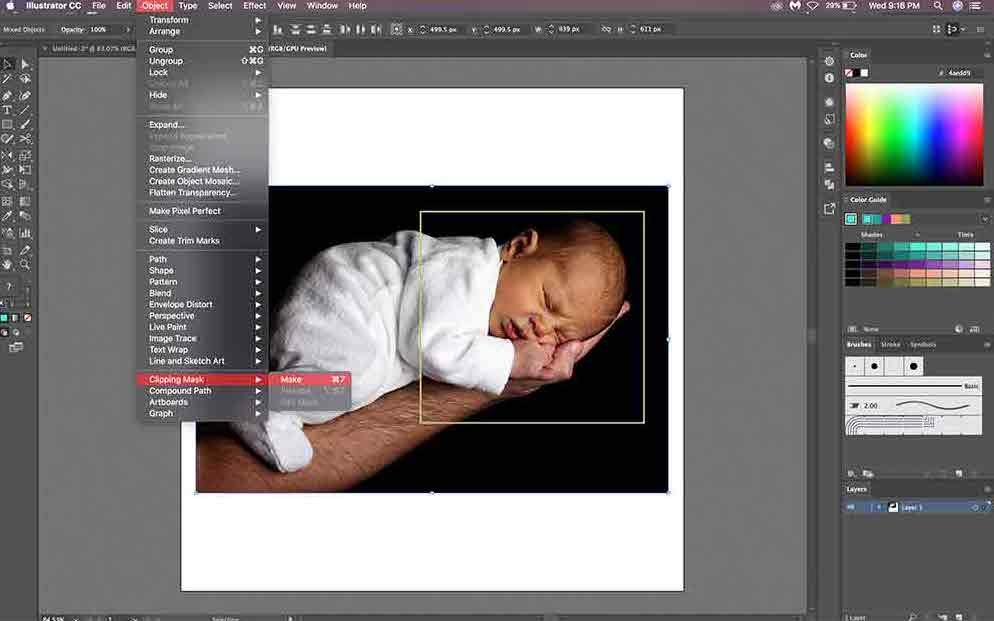
Step 6 – Select both the shape and the image. You can do so by holding shift while selecting the two. Once selected, both the image and shape will be highlighted in blue (as shown in the image).
Step 7 – Now from the options panel for Illustrator, Go to Object > Clipping Mask > Make. You can also pass Command + 7 for Mac and Control + 7 for windows to achieve the same results.
And the clipping mask will be made. The image will be cropped in the shape you made. If you made a mistake, don’t worry, you can undo it by clicking Edit > Undo. You can also right click on the cropped image and select Release Clipping Mask from the options.
Make any Shape you want.
If you want a more custom shape, you can use the pen tool to make any shape you want. Then repeat the same process. Remember to keep the fill color to none and the stroke at 1 as shown in the image.

We hope this article helped you in solving the issue of How to crop in illustrator. With the clipping mask trick, you can crop the image in more complex way and create a great image.
Read more tutorials about Adobe Illustrator: