
If you are a fellow 19-year old, you must have appreciated the pattern of red and black wavy stripes used in the PewDiePie logo, from his chair to his channel banner. But did you know that the PewDiePie logo tutorial is one of the easiest tutorials? Using Adobe Illustrator, I’ll show you how you can make the pattern in less than 10 minutes.
All you need is Adobe Illustrator software and the very basic knowledge of using it. I’ll mention the tools that will be used in this tutorial. These tools are;
- Rectangle tool
- Transform tool
- Envelope distort
- Direct selection tool
- Clipping mask tool
All these tools will be used on the very surface level, so if you are a beginner in learning Adobe Illustrator, don’t worry. It’s going to be as easy as blinking your eyes. Everyone’s a beginner in the beginning. Now, let’s begin.
Creating the artboard
The ideal size of the artboard for this should be 1,000 by 800 pixels, which gives a rectangle. But, since we are learning, we need a bigger space. So go ahead and select a large square, 1,000 x 1,000 pixels wide.
Step 1- Creating the stripes
Using the rectangle tool, create a thin and wide rectangle as shown in the image. This will the length and breadth of the stripes (black stripes over red background). Place this stripe on top of the artboard. Don’t make it too thick or too thin.
The dimensions of my stripe are 990 pixels length and 15 pixels in breadth. Align this object at the center and the top of the artboard.

Step 2- Using the Transform tool
The transform tool is not about transforming the shape or size of the object. This is a different transform tool. To get the toolbox out, go to Effects >> Distort and Transform >> Transform.
From the Transform effect toolbox, you don’t need to pay attention to scale or other options. I’ll have a detailed tutorial for that. All we need is the Move and copies section.
If you made the stripe with the exact dimensions as mine, then choose the same values I have chosen. Make the vertical value 35 px so that the stripe moves 35 pixels down. Leave everything as it is.
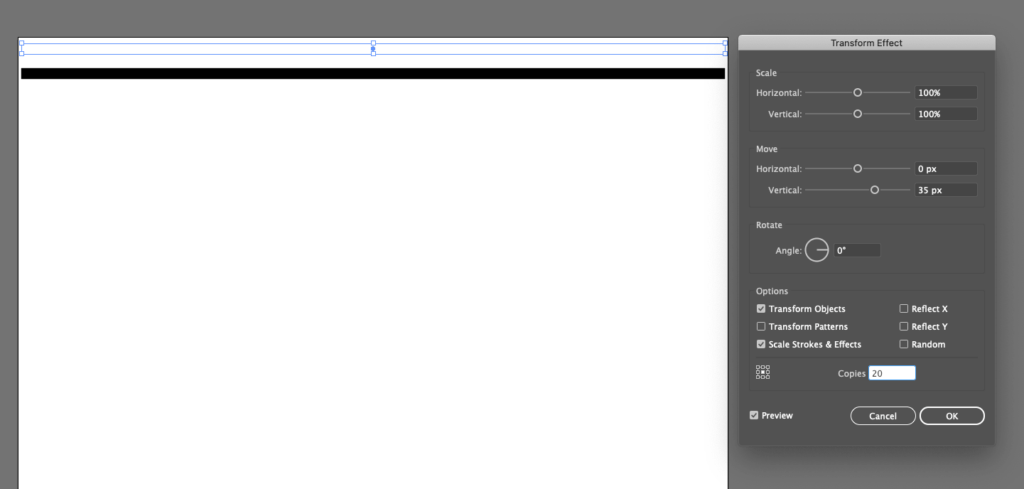
Make 20 copies of each stripe. Also, remember to have the preview box checked to see what changes are being done. Now we have equispaced stripes all across the artboard.
Step 3- Envelope and distort
This is where we start giving our simple striped pattern a wavy and distorted look. This will be achieved using the Envelope and distort option. With the topmost stripe selected, go to Object >> Envelope and distort >> Make with Mesh.

The toolbox gives an option for selecting the number of rows and columns to be created. Before doing anything, let me tell you a bit about it. This creates multiple points across the object that can be manipulated individually. Playing around with those points gives a distorted effect.
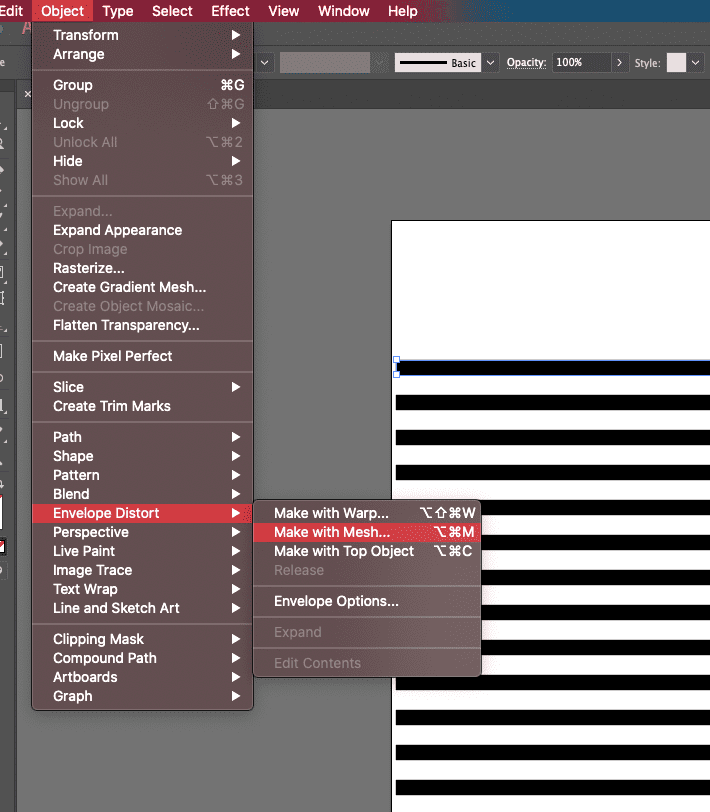
If you are following the tutorial’s numbers, set the value of rows to 5 and columns to 10. You can put your values just make sure rows are half of the column and the number is proportional to the number of stripes. Press done and you get blue lines creating mesh on the object.
Step 4- Distorting the stripes
After the mesh has been created, now you have to manually distort the structure to give it the wavy look. For that, choose the direct selection tool or press A to trigger it.
Using the direct selection tool, we have to select each alternating column. Hold shift while selecting these columns. Remember, select one row, leave the next one, select the one after the next, and so. Hold shift while doing it.
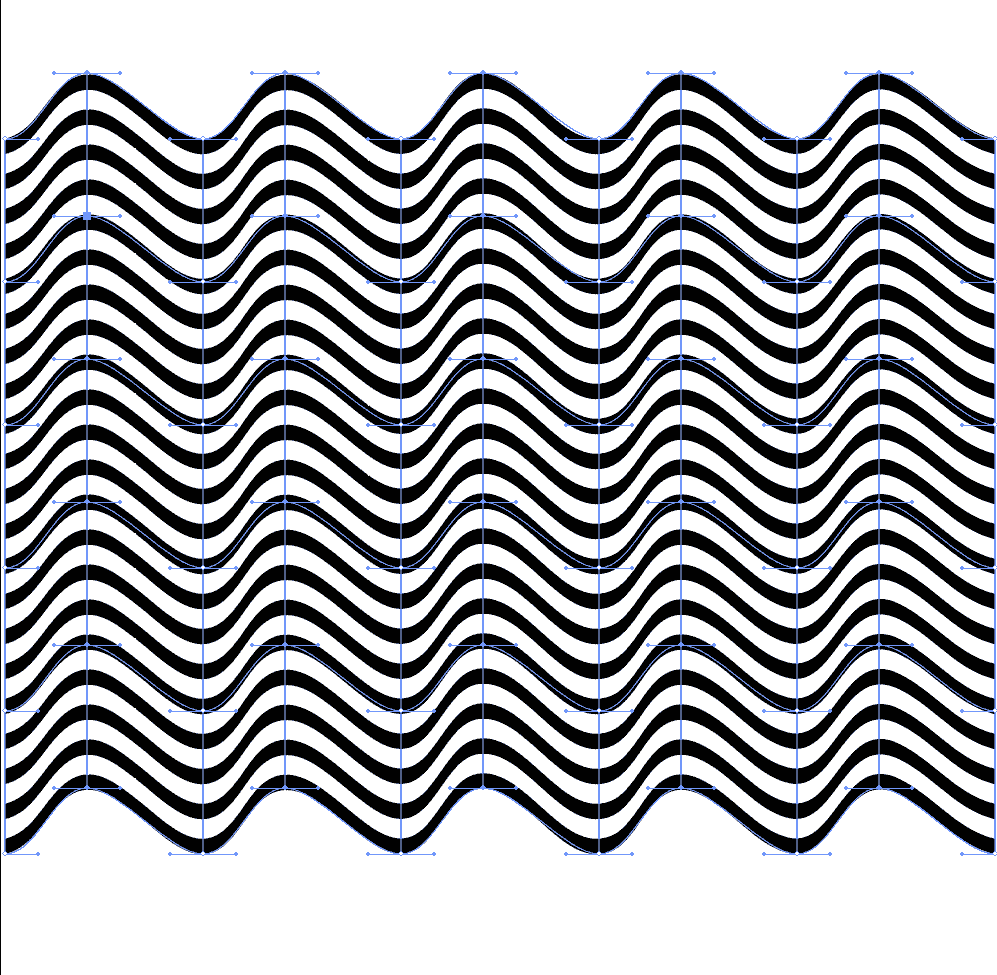
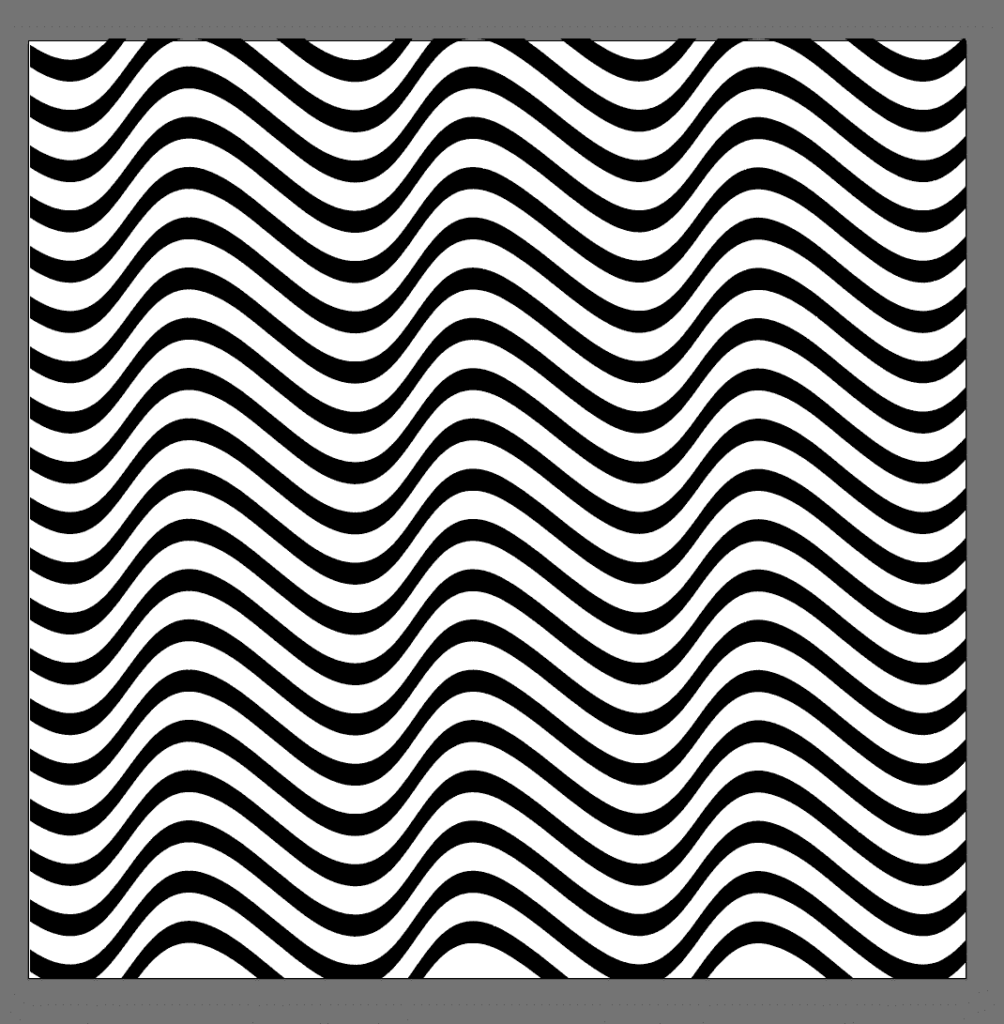
After you have selected the rows, click on any selected point, and then pull up or down. I’d recommend pulling up. Tilt it a bit towards the left or right for distortion. Now you have a slightly bent, wavy pattern.
Step 5- Pulling up and down
You can either stop here and skip this step if you want to keep the logo just like that. But if you want to add more distortion and create something like the image shown below, you can follow these steps.
There’s a reason why I am giving the mere act of pulling the points up and down a separate section. You’d think that arbitrarily distorting the shape by moving these mesh-points here and there would be easy. But it isn’t.
To give the distortion a clean look, start working with the first column, using the direct selection tool. As you select the first point of the first column, you either pull it up or pull it down. I pulled it up and in the left direction.
Now, select the next row (or the point below it). You have to pull this up as well. Pulling it down will neutralize the distortion effect. But unlike the left direction, I’ll move it in the right direction. Each point gets alternate sides. Repeat it for all the columns and rows.
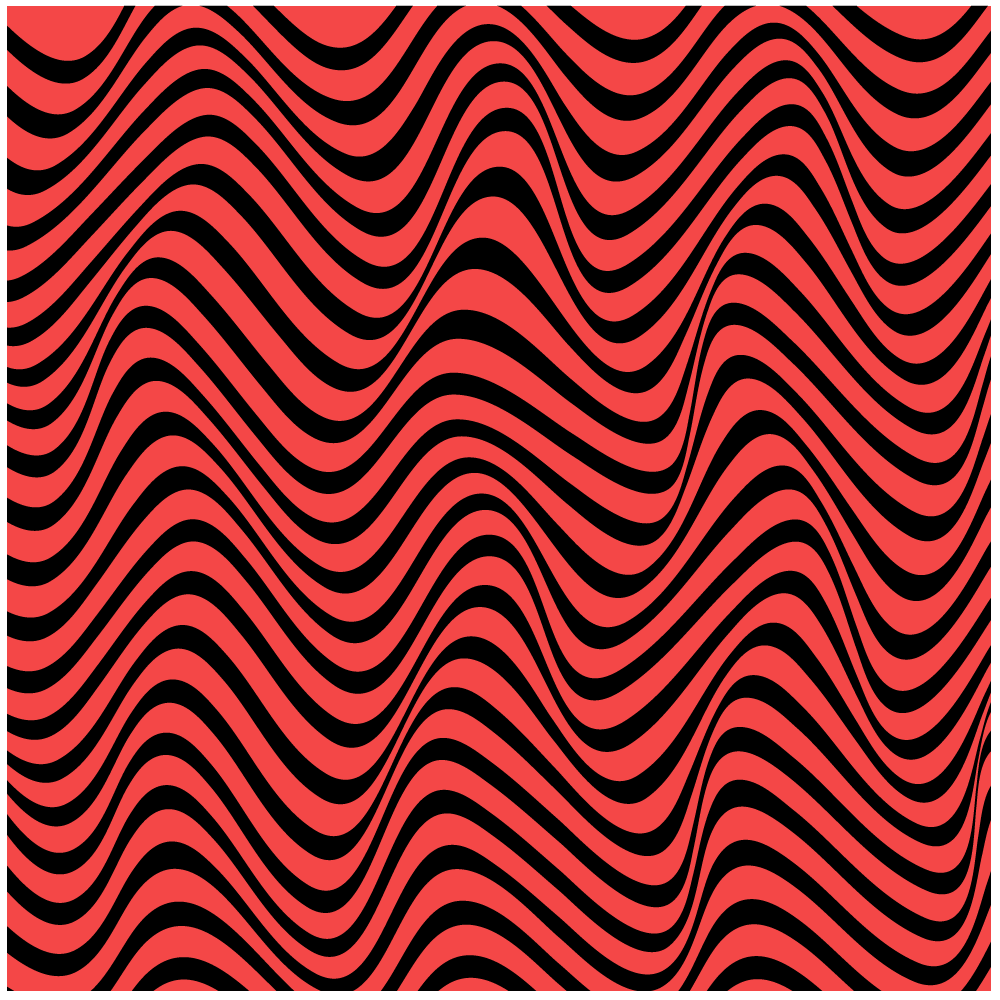
Step 6- Using clipping mask
After the pattern has been created, increase the size by using the selection tool. Press and hold shift + option (alt for Windows) to do it proportionally.
Make a rectangle or a square where you want to put this pattern. I am gonna go with a square. Make sure it is an outline and sits above the pattern. Select both the objects (square and pattern).
Go to Object >> Clipping Mask >> Make or press Command + 7 (Control + 7 for Windows). It should exclude any pattern that is outside the square (or rectangle) that you created.
Step 7- Making the background
The background is the easiest thing to make here. Just make a square using the rectangle tool and color it red. The hex code of the red color I have chosen is f44747. Place the background behind the pattern. And there you have it, PewDiePie background pattern made easily in Adobe Illustrator.
Learn more Illustrator tutorials:
- Learn to use the Shape Builder tool in Adobe Illustrator
- Use the texture feature in Illustrator to add noise to your art
- Typography tutorial to make amazing text illustrations
Conclusion
This was an easy tutorial. Since the goal was to make the famous PewDiePie pattern of red and black, I chose the specific color combination. But since you’ll be practicing, why don’t you try different color combinations? Let me give you some for your practice.
Background – 424141, Pattern – f7fdb6
Background – fffde1, Pattern – ff4273
Background – 000249, Pattern – ff5151
So go ahead and create something beautiful. While you create, I’ll find new things to teach.