
Adobe Illustrator is a vector-based tool. This means that the majority of the work is done on vector-based objects and not pixel-based. So Illustrator is suited for digital artists while Adobe Photoshop is suited for image editing. Photoshop has a feature that allows the removal of the background of any image. But how to remove the background in Illustrator? Is there a way? There are two ways and it is quite easy.
The two ways of removing the background from any image are by using the clipping mask feature and image tracing and then deleting the unnecessary portions. Granted that these two methods could be a bit tedious compared to Photoshop, but hey, it can be nevertheless.
Here at Techcity Times, we always give a much easier way of doing things and this is not an exception. I’ll show you how to quickly remove the background that you’ll never find anywhere else. Let’s begin with the tutorial.
Using clipping mask to remove background in Ai
This is one of the quickest methods of getting rid of the background. Not just that, but you can remove the background of any image or vector in any shape you want. So how to do it? Using the pen tool.
The pen tool can be intimidating for some new users of Illustrator, but trust me, the learning curve is very shallow and once you learn it, it’s going to be a piece of cake.
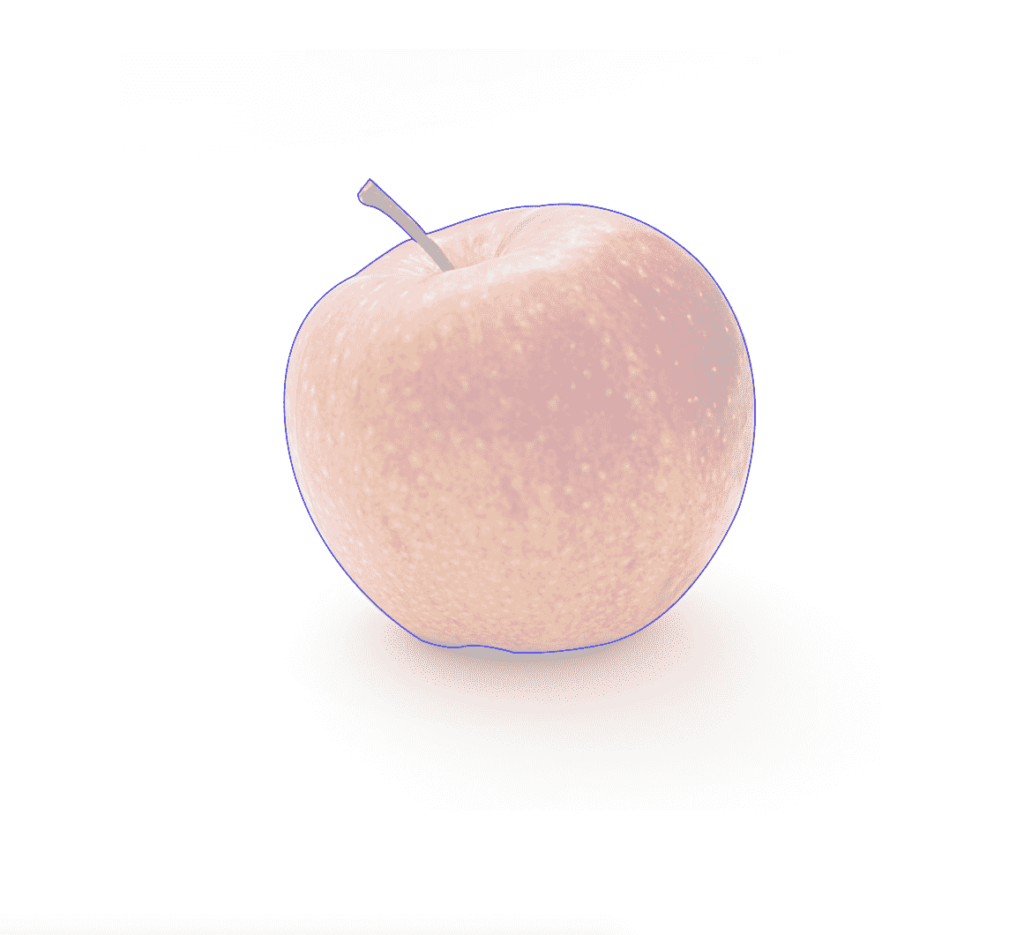
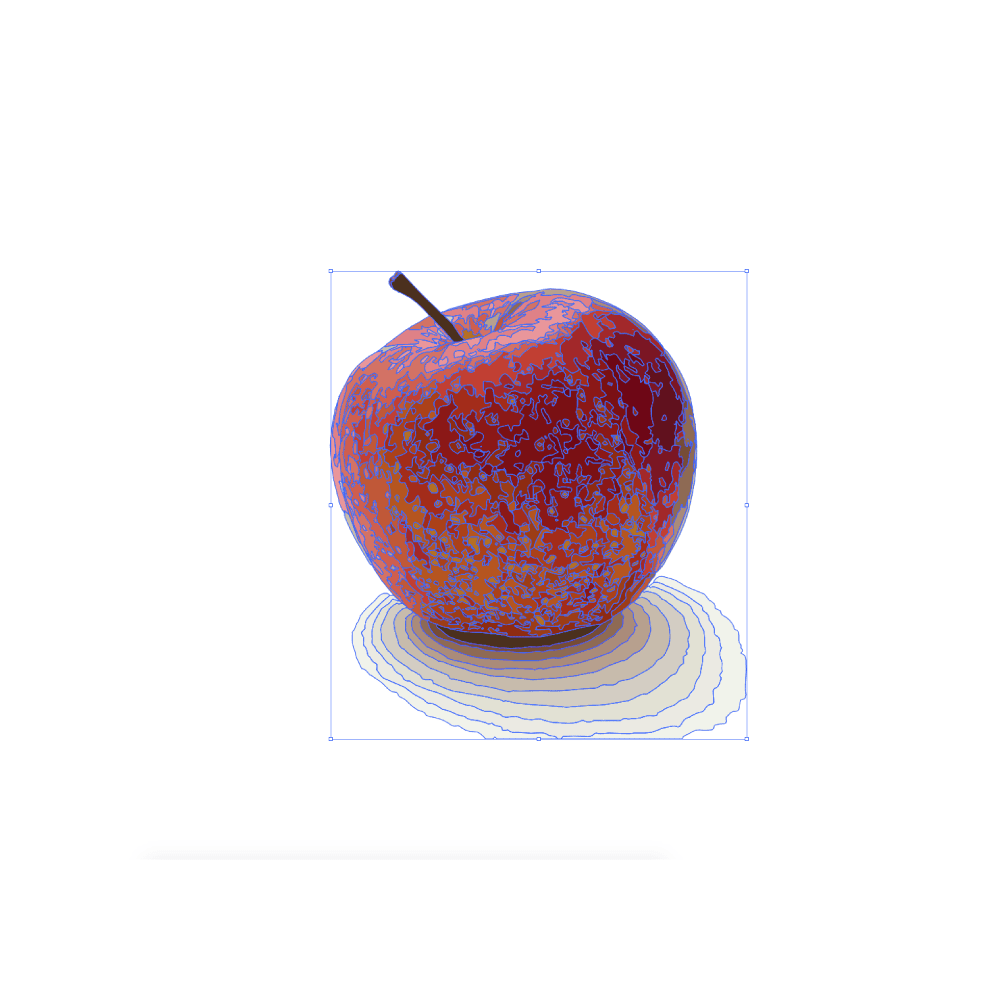
First, let’s choose an image. I’ll choose something very simple and easy to work with because I don’t want to unnecessarily spend more time tracing the edges and I want to give an easy explanation that is clear to see and follow. The image I am choosing is of an apple in white background. This to keep the example easy to see and follow. You can get the image from Pexels. The image is by Mali Maeder
Step 1– Place the image on the artboard and then choose the pen tool by pressing P on the keyboard or choosing it from the toolbox.
Pro tip: Lock the image you are working with for the next step for accidental clicks on the image. Go to Object>>Lock>>Selection. Unlock it later using the same menu.
Step 2– With the pen tool, start creating an outline of the object you want to trace. This can take a lot of time and patience if the image you are tracing is complex. It does not have to be a perfect trace, but try to stick to the outline as much as possible. Once you become fluent with the pen tool, it won’t be much of an issue.
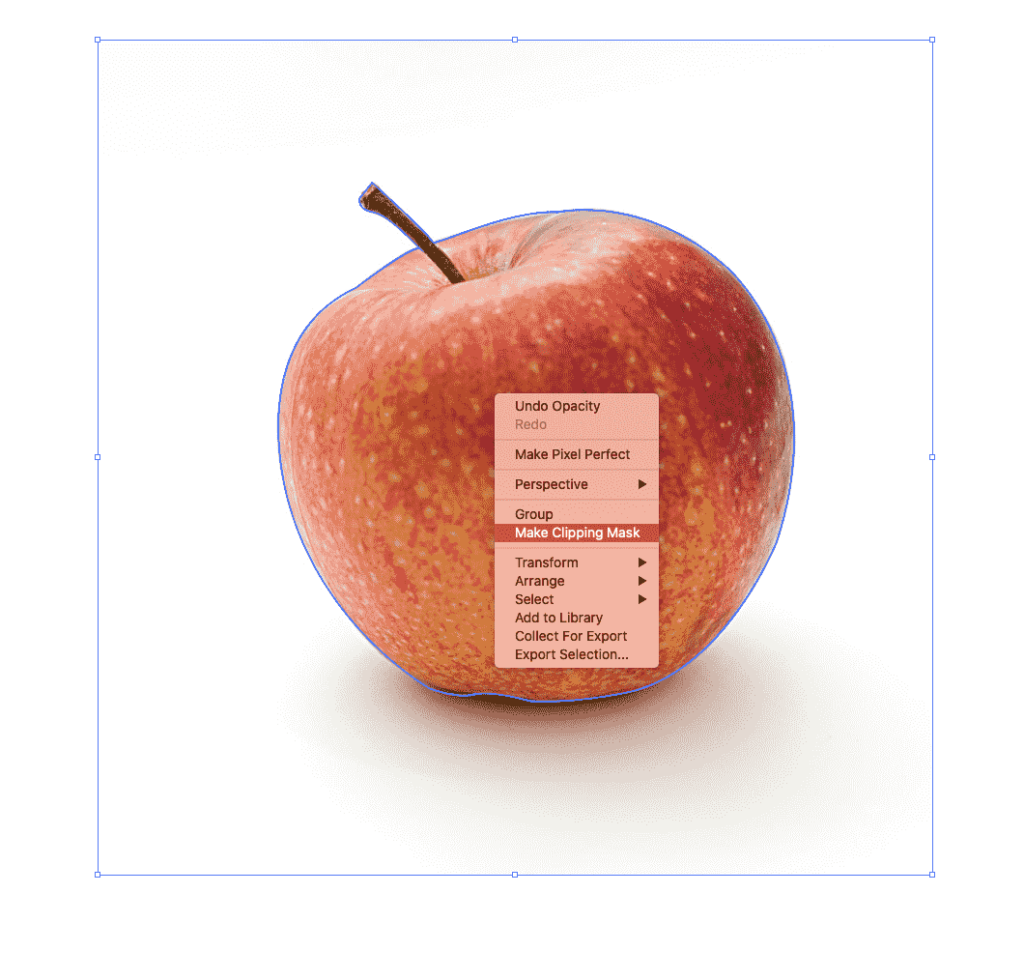
Step 3– Make sure that you connect the outline created and no open end remains. This will allow us to create a clipping mask.
Step 4– With the outline placed on top of the image, select both and then right-click to access the menu. Select the clipping mask from the menu and right in front of your eyes, you’ll see the background image disappear and only the selected part remains.
This was a quick and easy way of getting rid of the background. This method is preferable when the background of the image is very complex. When the background is a simple solid color such as white or black or is not complex, the image trace method is preferable. Let’s see how that works.


Using image trace to remove the background
Image tracing converts a pixel-based image into a vector-based object with multiple colors/black and white/greyscale parts. This is preferable when the background is uniform in color and composition. You’ll see why. So how to image trace? Very simple.
Step 1– Select the image you want to trace and then place it on the artboard. If the image is very large, Illustrator will ask you to rasterize the image or it will rasterize itself.
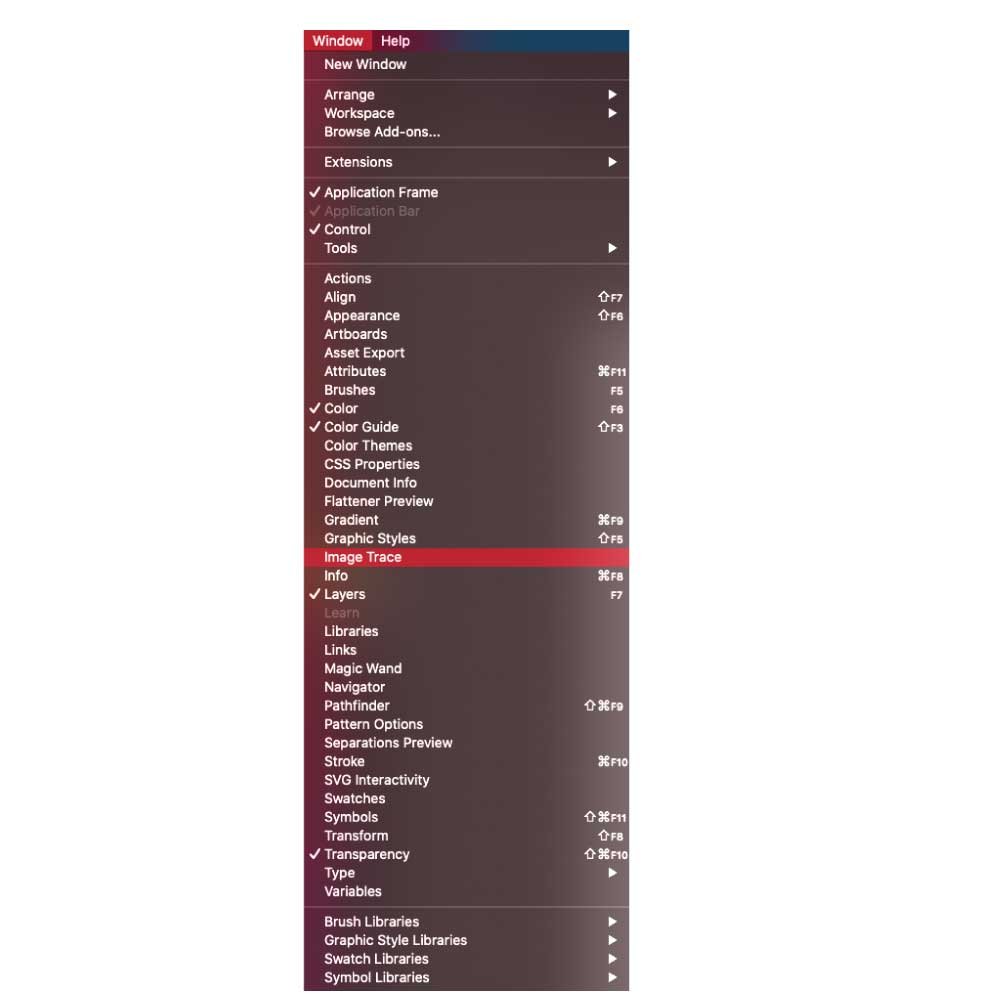
Step 2– Go to Window>>Trace and you’ll see the image trace window popping out. It can be a bit overwhelming to see all those options but don’t worry, it’s not that difficult. I’ll make an image trace tutorial later and link it here.
Step 3– Set the color to 16 or above. More colors mean more detail. You can also set it to 30 colors. Click on the drop-down arrow to access advanced options. If the background of the image is white, select the “ignore white” box and then trace the image.
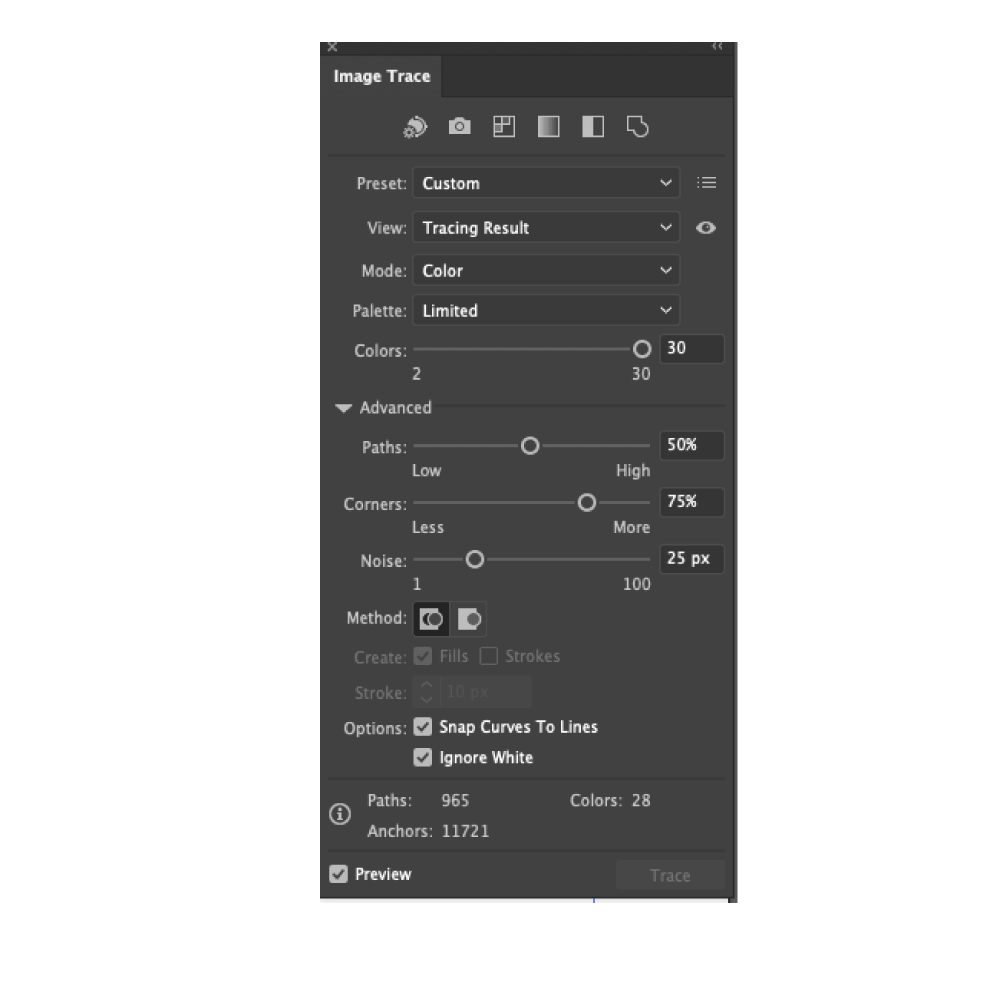
Note: Only use the ignore white option when there is no white color in the foreground or the part of the image you want to keep. If it has white, it will turn transparent.
Step 4– Click on the expand button to convert it into a vector. Remember not to resize the image before you expand it. If you do, it will repeat the tracing process.
This will get rid of the background and you’ll have a well-defined image with the background gone. But what if the background is a mix of different colors and you don’t want to use the clipping mask method? Then here is the easy way of removing the background using the image trace feature.
Using the select feature in Illustrator
For images that have more colors in the background other than solid black or white, we’ll have to get rid of the background manually. This is done by selecting the different shades of the background and deleting them. But this can be tedious and time-wasting. So what is to be done? We can use the “select” feature of Illustrator to let the program do most of the work. Here’s how to do it.
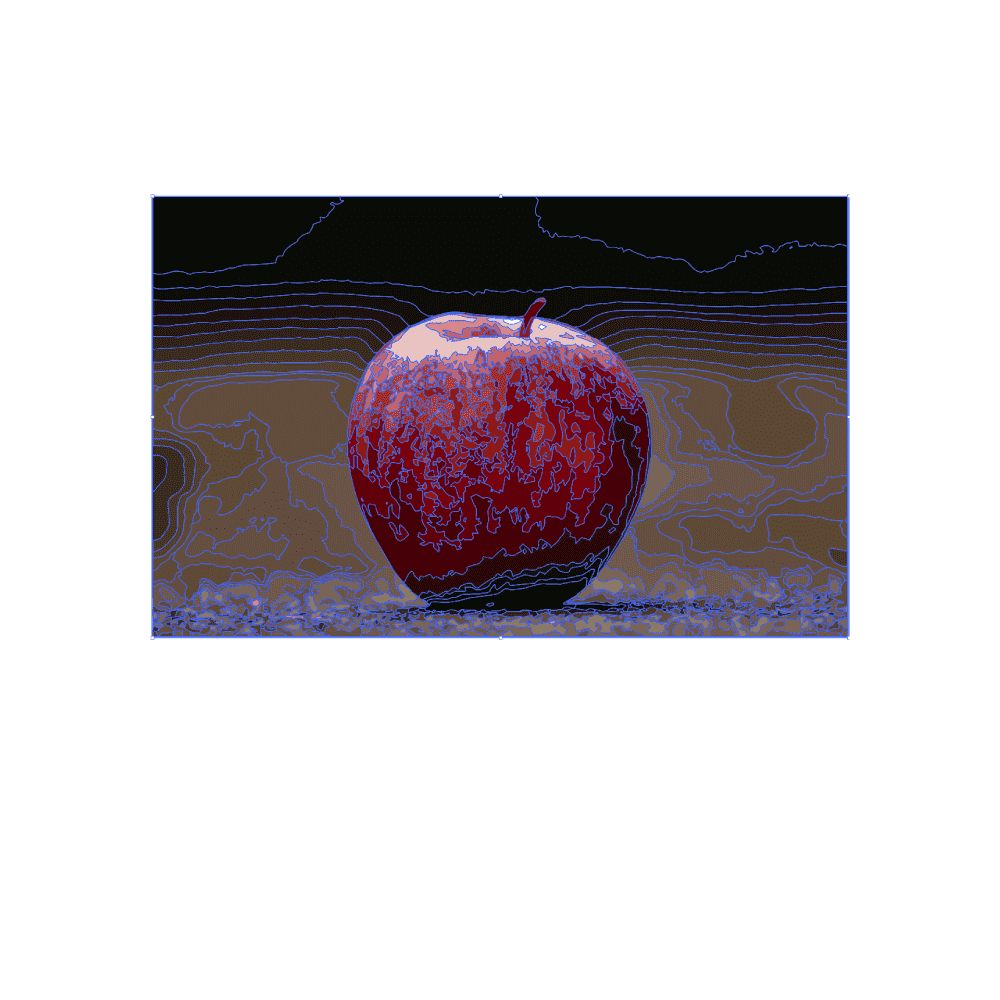
For this example, I’ll use an image with something in the background instead of plain white. The image I am choosing is by Pixabay. You can get the image here if you want to follow along.
Step 1– Trace the image and do all the things as mentioned before except ignoring white. Expand the image and you’ll see the whole image gets divided based on the different colors.
Step 2– Select a color that is in the background and you want to delete it. Keep it selected and then go to select>>Fill color. You’ll notice that similar colors have been selected. Press delete.

Step 3– Repeat this process by selecting one color and then using the select feature to select all the fragments with the same color. In no time, you’ll get rid of the entire background efficiently.

There is one more way of doing it even faster. This is to be done when the image you want to isolate is simple. Trace the image and then select the part you want to keep. Once selected, lock the objects by pressing. Now only the background can be selected. Select all of it and delete it.
One more method that I have to use when the image and the background are too complex is by tracing the entire image and then removing the parts of the background right next to the image I want to isolate. This creates a border between the useless background and the usable portion. Once done, deleting the background is a breeze.
This was how to delete the background in Adobe Illustrator in an easy way. I hope it was something new and helpful. Keep practicing and keep creating something amazing. You can read more articles about Adobe Illustrator tutorials to hone your skills as an illustrator;