
Illustrator has a plethora of tools that can make some of the finest illustrations, from logos to character drawings, product mockups, etc. But the sheer amount of tools in Illustrator can be overwhelming and it is best to understand each tool, one by one. Illustrator Blend tutorial is what we’ll be focusing on this article, learning what it does and what you can create using it. Blend tool can look very complicated and difficult to grasp for first-timers. But trust me, once you know the basics, it is a piece of cake.
This article will cover the basics of the blend tool which is all you need to understand. You can of course experiment with it, play around, and produce great results. What is the blend tool? What does it do and what are the tweaking blend tool can have? All these questions will be answered in this tutorial.
The article will focus on four major topics about the blend tool;
- What it does
- Its application on shapes
- Its application on colors
- What’s specified steps and specified colors
- Replacing spine
- Application of blend tool on different shapes
- How blend can be used on text
- Typography using the blend tool
- Using roughen and blend to make great illustrations
Let’s start the first part of learning about the blend tool, what is it and what it does?
What does the blend tool do?
To get the basic idea about the blend tool, a lot can be inferred by the name. Like a blender, it mixes (blends) two different vectors. It could be shape, color, paths, anything. It’s like taking a blender and blending two different things.
Imagine you take ginger and cola. Put the two in a blender and turn it one. What you get is ginger-flavored cola. There’s cola you can taste and ginger as well. So you get a unique thing, that has the quality of both the original component. Something very similar happens with the blend tool in Illustrator.
Take another example. If you put a pastry and a burrito in a blender and turn it on, you get a demon-spawn of an unholy concoction that can summon the creatures from the depths of hell. Never do that.

Look at the image. In the top row, on the left side, there’s a square. On the extreme right, there’s a circle. These two shapes are very different but blending these two results in the intermediate shapes, i.e., a circle that gradually turns into square and square that gradually turns into a circle.
The next part is similar, but the transition occurs from circle to hexagon. In the third line, there’s something more happening. Along with the shapes changing gradually, the color changes as well. From red on one side to yellow on the other, there’s orange in between. This is the blending of two shapes and two colors at the same time.
Blend tutorial on colors
Using the blend tool on two similar shapes with different colors, you can get a gradient, just like the one you get using the gradient tool in Illustrator. The image below is made using two circles of different colors and the blend tool.

Note that if you change the size of one circle and make it bigger or smaller than the other, there will be a gradual increase/decrease of size as well. Blend tool blends everything.
So take any two or three or more colors and create shapes to blend and what you get is a smooth gradient of the two colors running across the distance between the two shapes. But the dialogue box has one more option; Specified steps. What does that do?
Specified steps in the blend tool let you decide how many transitionary shapes or elements you want there to be between two original elements. The image that you saw about the shape transitions, there were three transitionary steps. You can have as many as you want. But after a certain number, the difference does not appear. This brings us two the similarities between specified steps and smooth color.

Smooth color is nothing but a lot of intermediate steps between two shapes. This conversely means that if you add too many shapes between two shapes of a different color, after a point, it looks like a gradient.
All these concludes the basics of specified shapes, smooth color, and the effects of blend tool on different shapes of same or different color and sizes. Now let’s see what can be achieved using the blend tool. How can one create great typography using the blend tool?
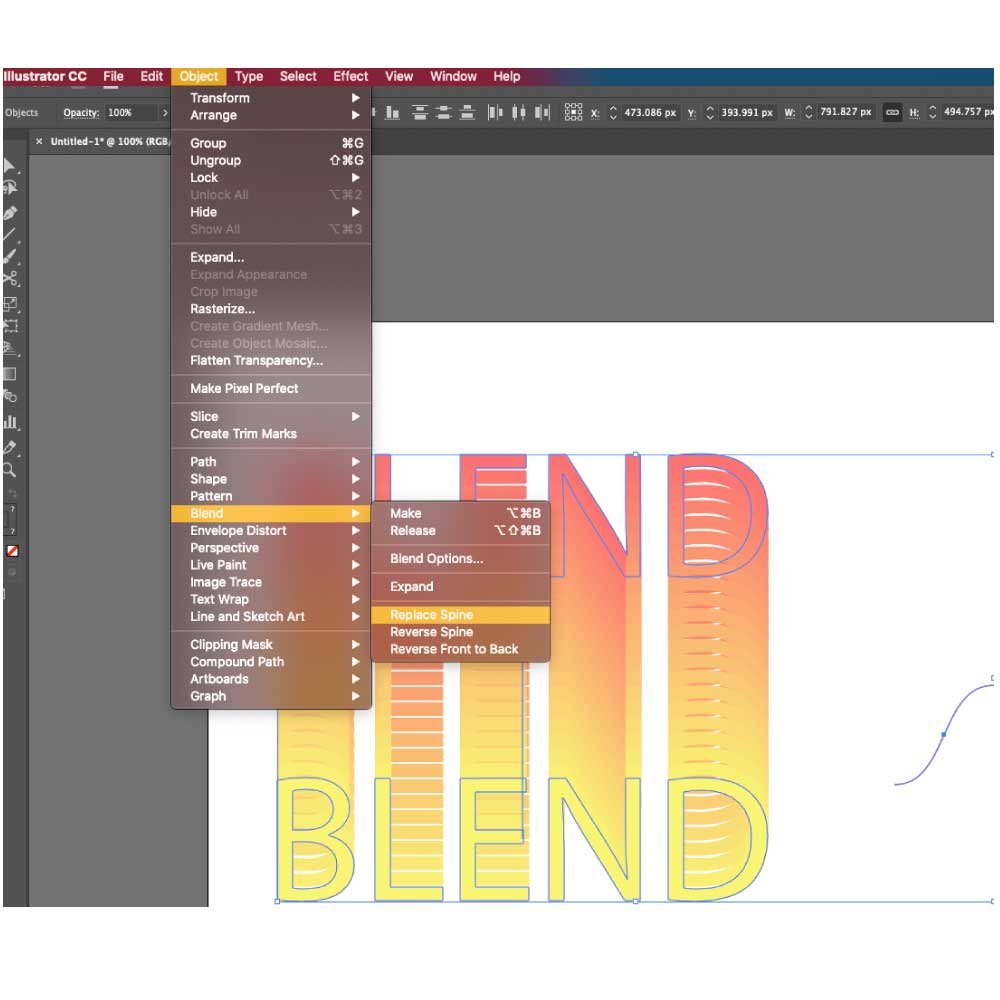
Replacing spine
Before we start using blend tool to make custom shapes, we need to understand what replacing spine means. When you make a blend between two shapes, you always get a straight path, never a curve, or any custom shape. You can see that in the gradient blend pictures. Notice how it runs in a straight line.
In all blended shapes, there is a thin line that runs inside the shape. It is the spine, just like the human spine or a spine of a book. The orientation of the spine determines the shape of the object. This spine can be replaced to give the blended object any shape you want.
Just make any simple line that is not a compound path (more on compound path later). Select the blended object and the simple line of any shape. Then, go to Object >> Blend >> Replace spine. You can also reverse the spine to change the orientation. I recommend playing around with it to get a good grasp and let your creativity flourish.
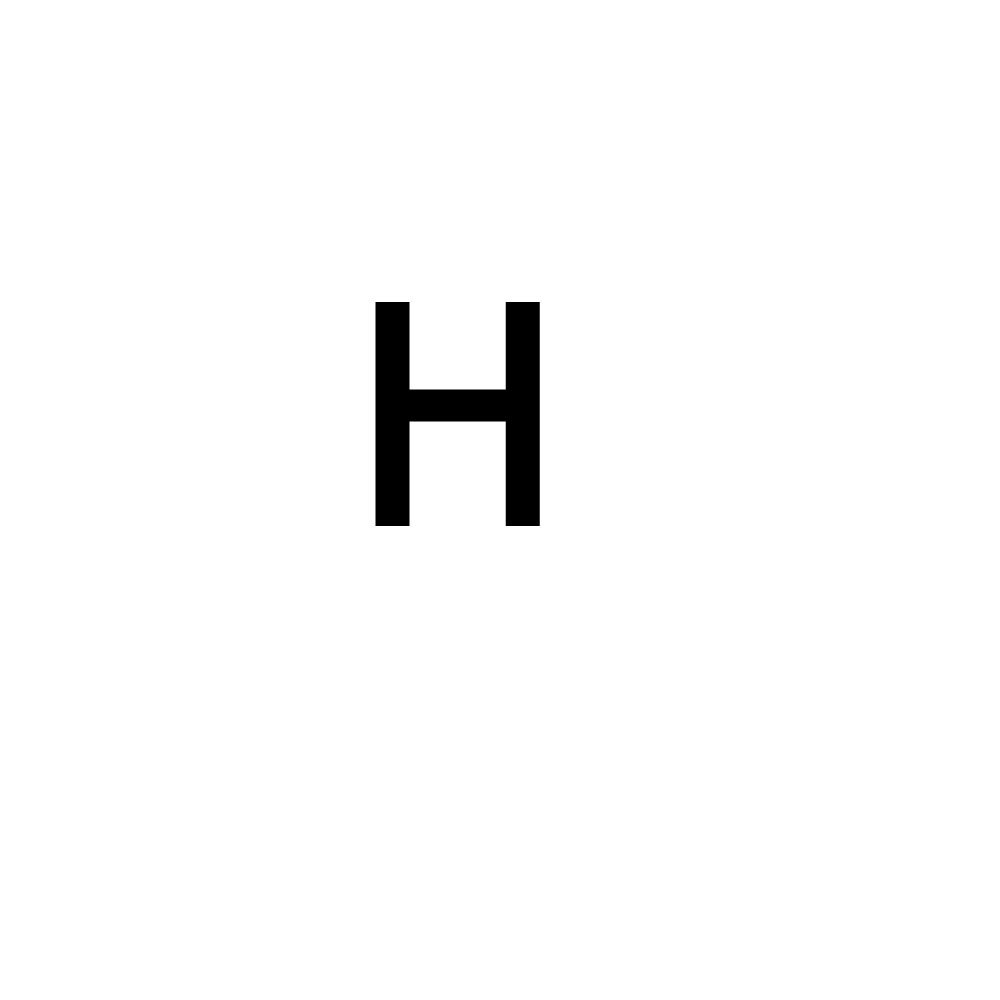
Since we touched on the subject of replacing the spine and compound path, let’s look at how blend tool can be used to add a blended element on a text object. We’ll use the letter “H” as an example but you can do it on any text. The process will be the same for all.
Using blend tool on text elements
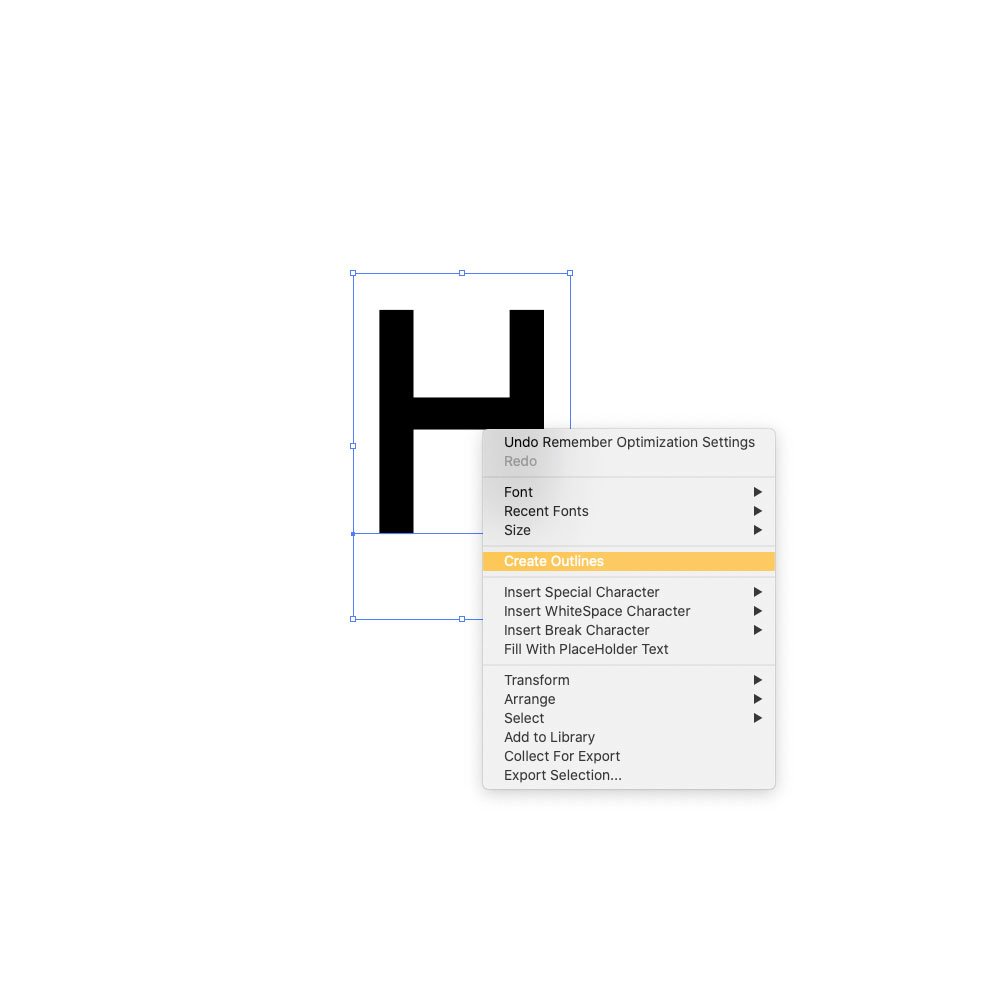
Using the type tool by choosing the type tool from the toolbar or just by pressing “T” on your keyboard. Type a letter, we’ll use “H”. This is a text file. You cannot add effects or gradient color or blend unless you turn it into outlines. Outlines make it a vector shape that looks like “H”. I have used Futura medium. You can use any font you like.
Pro tip: To make the corners rounded, use the direct selection tool (by pressing “A” on your keyboard). Then click on the letter and look at the dots that appear inside. Click and hold and then drag down as you make the corners rounded.

Now comes the complicated part. First, using the color fill box, create the outlines of the letter as shown in the image. We just need the outlined shape of the letter. We need to use the scissor tool to break cut the lines. Why do we need to do that?
Blend tool needs a spine that has a starting point and an endpoint to put the two sides of the blend (like the square and circle). If there is no end or beginning points, like in the case of the letter “H”, there is no place to put the blend start and endpoints. Hence, we need to create those points. This is why we need scissors. Scissors cut a point on the complex lines and this breakpoint acts as a starting and endpoint, like cutting a circular ribbon.
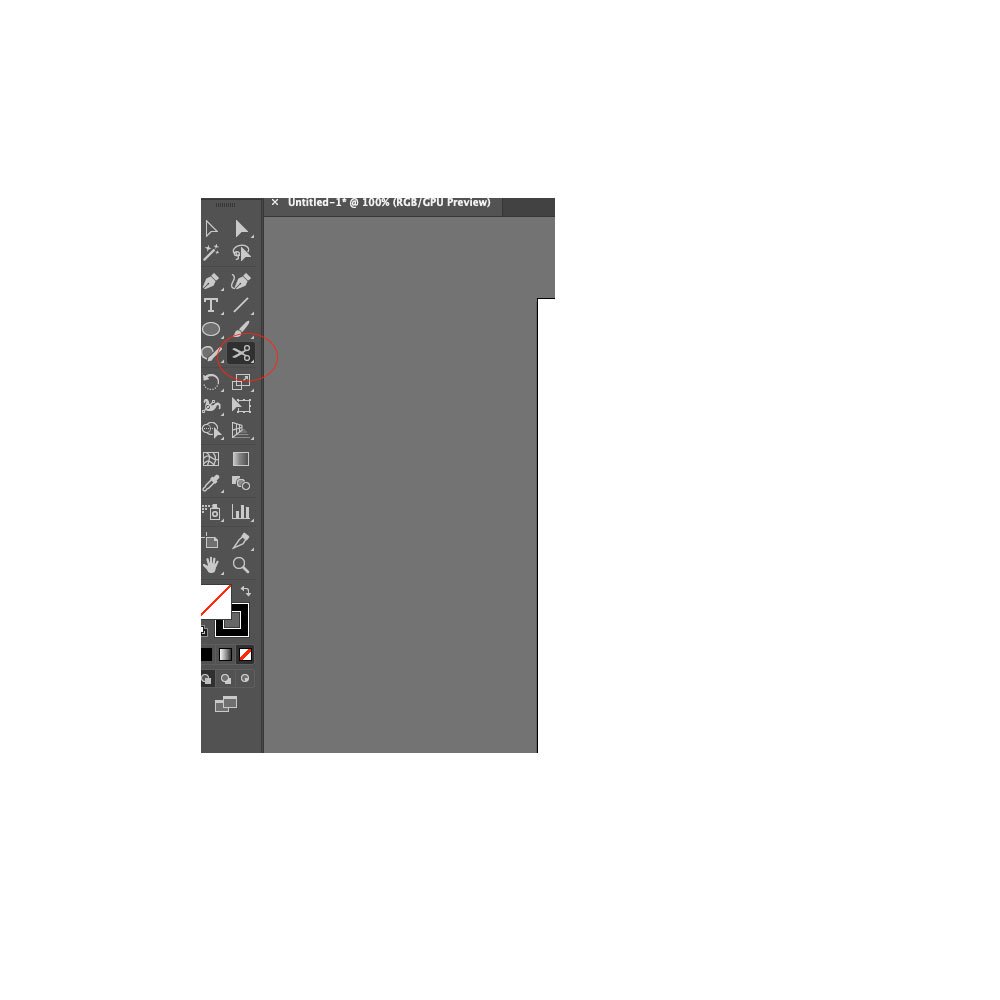
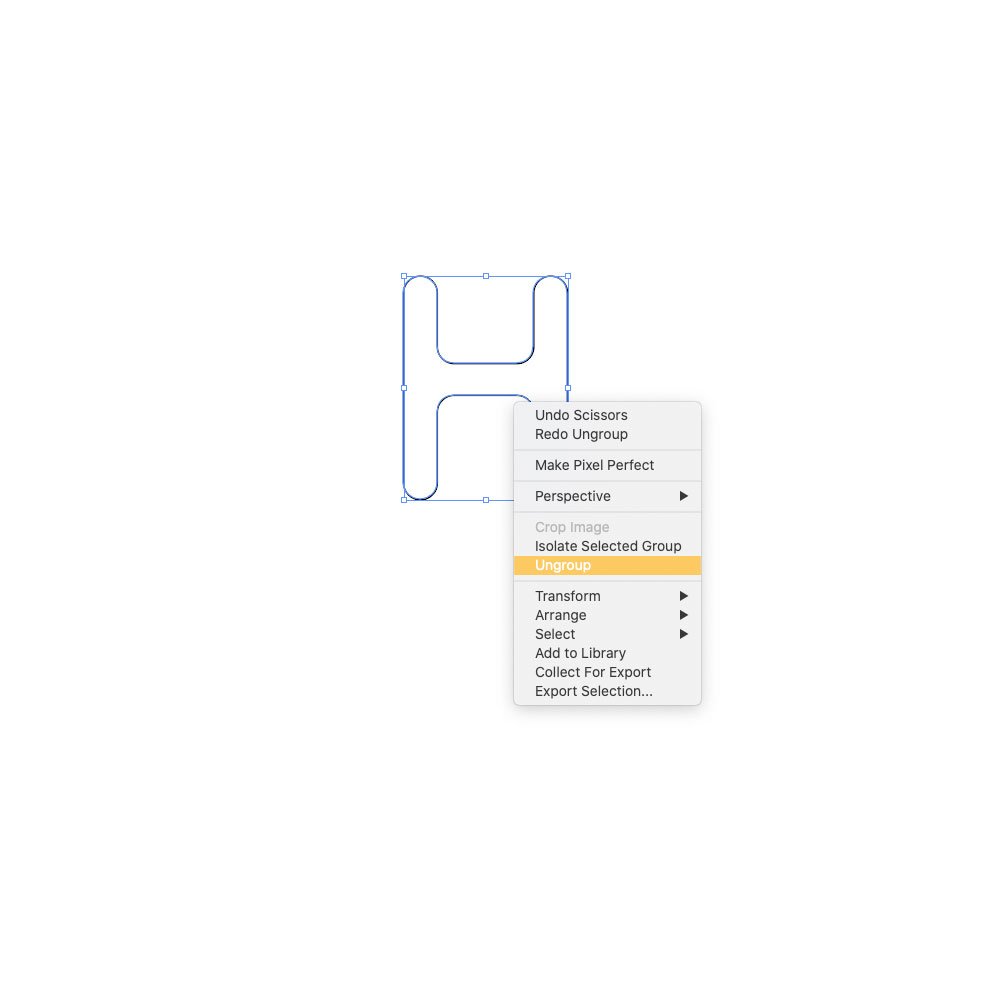
Use the scissor tool and click on any point of the “H” outline. But the job is not over yet. There is an endpoint now after you have “cut the ribbon”, but it is still grouped. So right-click on it and select ungroup. But the job is not over yet. You need to right-click on it again and select the Release compound path option. Compound paths are complex shapes made using simple lines and it cannot be used to replace the spine unless they are converted into simple objects.

Now, you are ready. Create a blending element. I used to circles each with a gradient. The colors I used are 1FA2FF, 12D8FA, A6FFCB. Make a gradient as shown in the image. Select the number of the specified steps to 180-250. Now select both the elements and go to Object >> Blend >> Replace spine. Boom, you have something similar to what you see in the image.

Replace the spine

You have either have that or you can add more to it. I added a fur-like appearance. This is quite easy to accomplish. Select the “H” and then go to Effects >> Distort and Transform >> Roughen. Select the values that are shown in the image or tweak a bit to make it the way you like it and you have something that looks like H wearing a fur jacket.
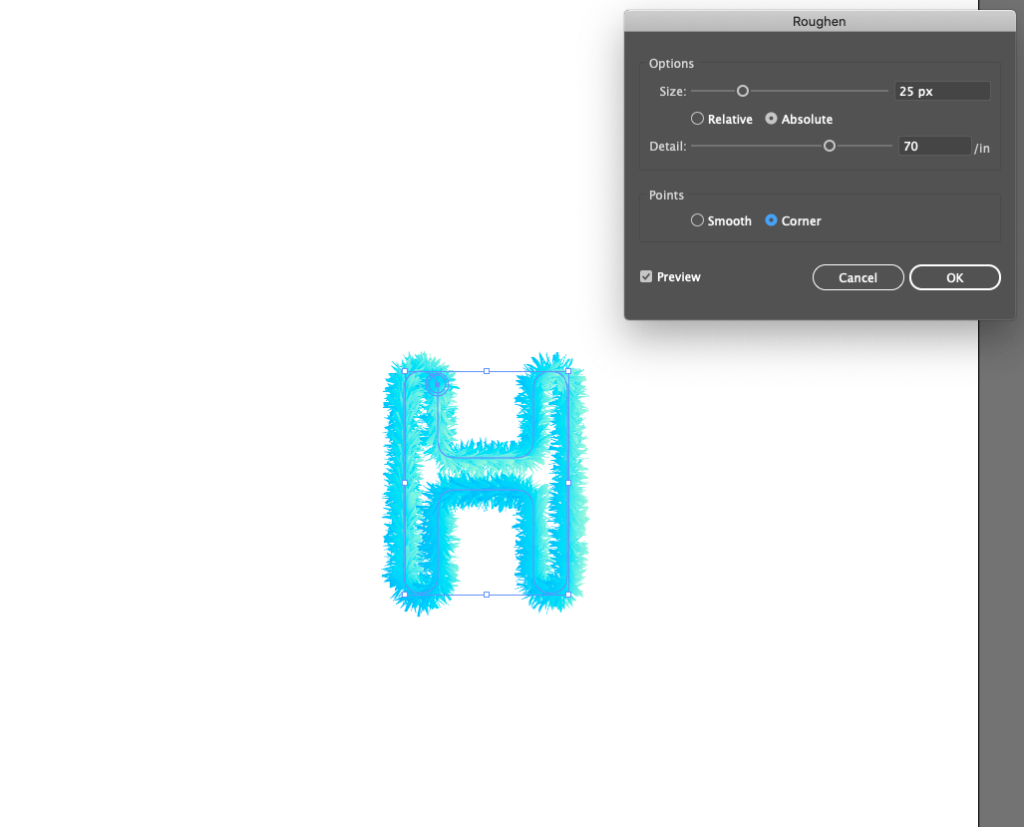
Note: Do not increase the detail slider on roughen suddenly as it can cause Illustrator to crash.The same process can be repeated on any letter and you can get similar results.
Using blend to make typography
Look at the image above. Trust me, making that is very easy and will take around 2-3 minutes. Here’s how you can do that. Let’s begin by just typing a word. I used “Blend” using the font Futura medium. Make a copy of it and place it right below it. Change the color of the text to something opposite, like I chose yellow.
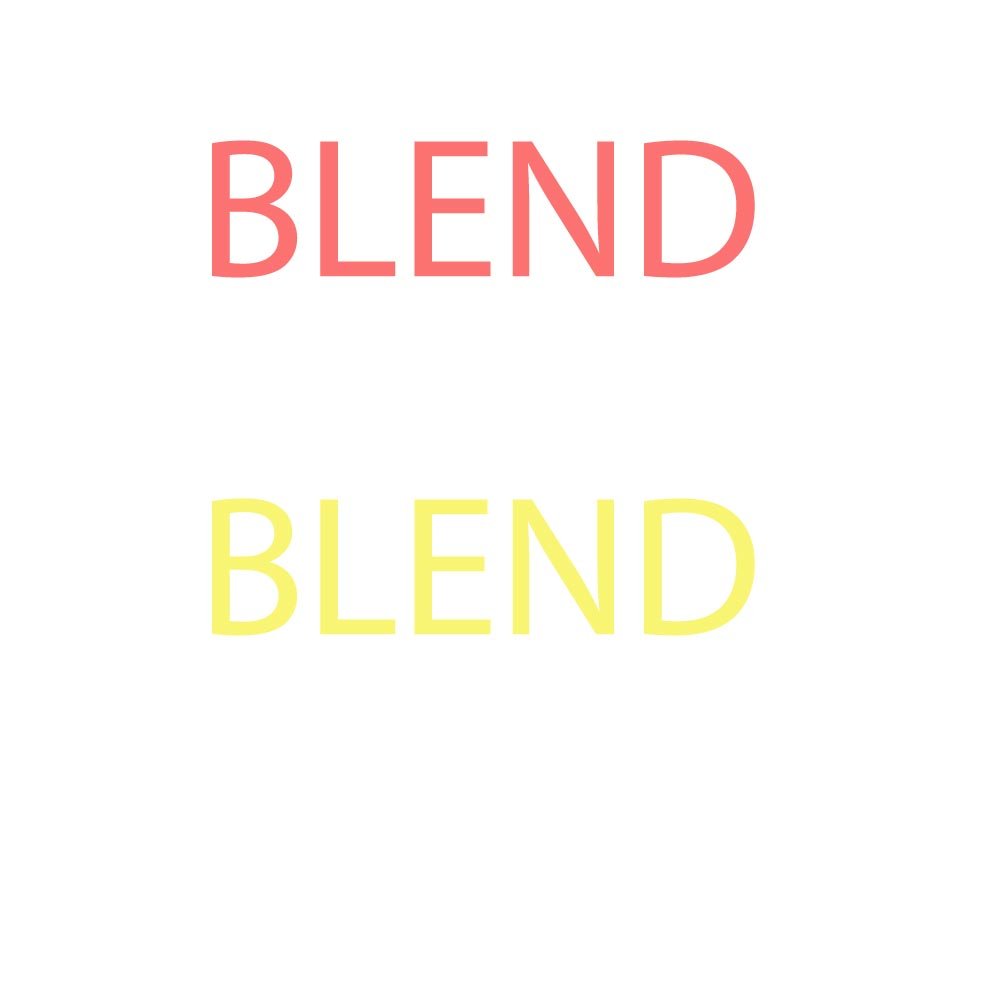
Convert both the texts to outlines and then, blend it using the blend option in the toolbar or by pressing Option+Command+B in Mac.

Increase the number of the specified steps to 20 steps and you’ll get something that looks very similar to the one shown in the image. You can choose any color you want.

Now comes replacing the spine. Using the Circle tool from the toolbar or just by pressing “L”, make a circle with an outline and no fill. Now, select the direct selection tool (A) and click on the circle. Remove the three halves of the circle to get something like the one shown in the image. Just click on different points of the circle and hit delete.
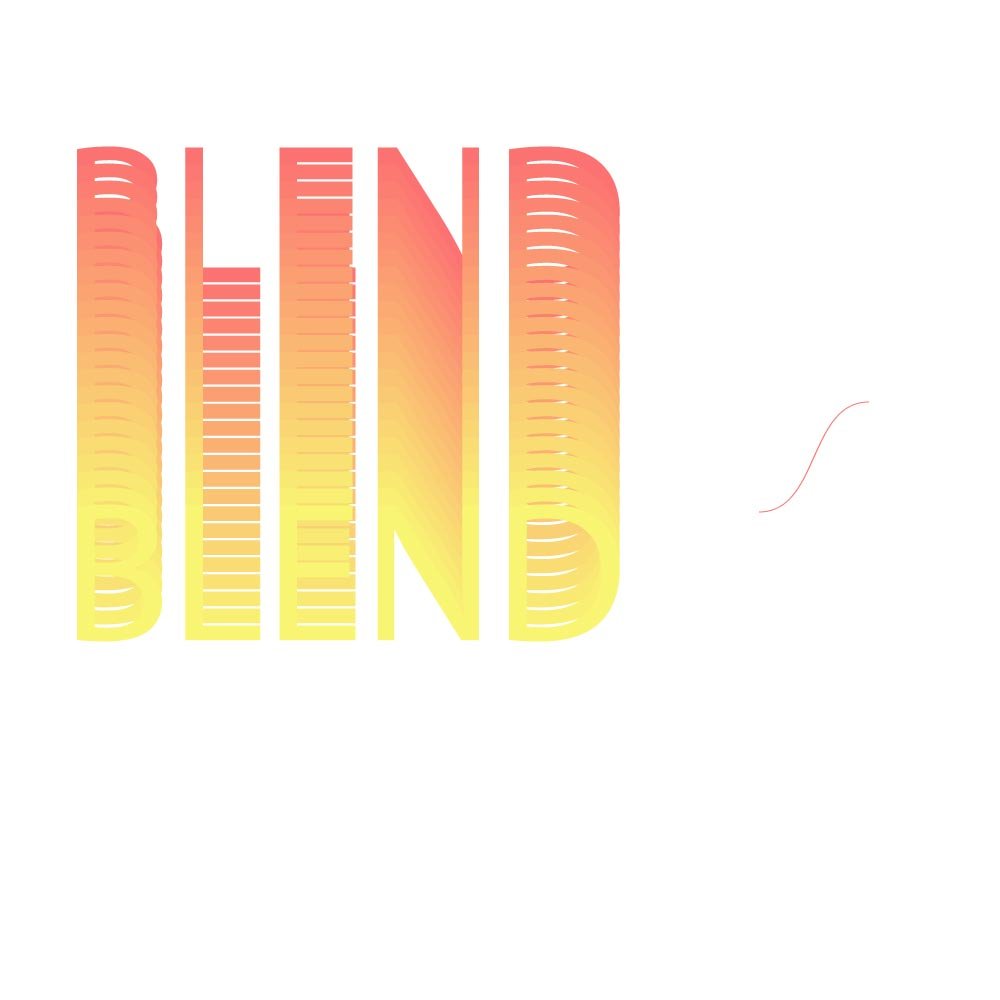
With the curved line, click on one end of it and then twist the anchor point to make the curved line as shown in the image. Note that you don’t need to follow only this process to get the results. You can use the pen tool to trace it and get a line of this shape.
After replacing spine, apply roughen

The specific values of roughens I have used
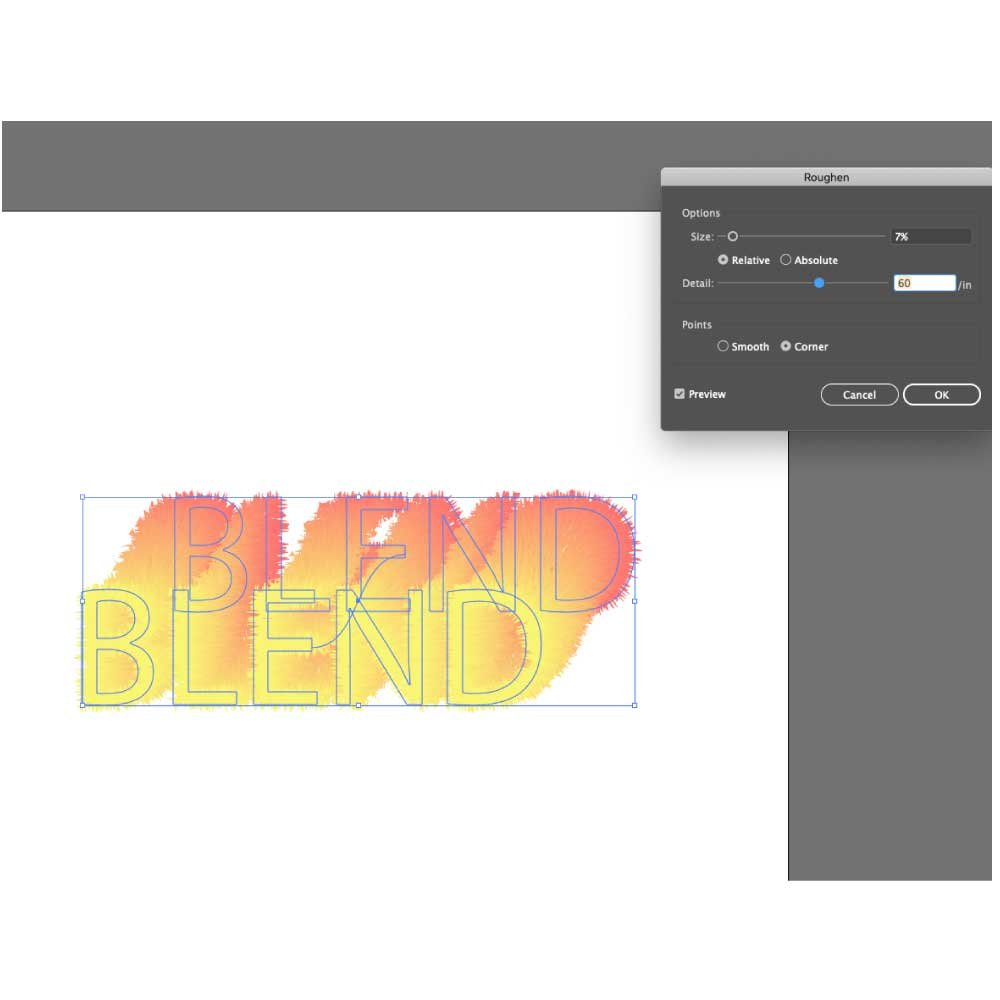
You are familiar with the next steps; Blend >> Replace spine…Roughen and then the values as shown here or according to your liking.

The result would give you something like the one shown at the beginning of this section. You can also use the reverse spine option and get something like the image shown on the starting of the article. Change the colors, fonts, sizes, and outline stroke to get a customized effect.
Conclusion
These were the basics of blend tool. You are always encouraged to tweak with the, combine effects with other tools such as the texture tool (you can read the basics of texture effect for noise here). You can also mix variants of color, size, and shape of elements and get brilliant results. So go ahead and create a brilliant illustration. You can also learn this typography trick that is simple, easy, quick, and effective. Or perhaps learn about the use of Clipping mask in Adobe Illustrator. For different gradients, I choose uGradients website for brilliant gradient colors.